


EPSON Stylus PHOTO 810/820/830 Revision B
Disassembly and Assembly Disassembly 107
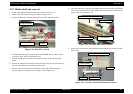
4.3.7 Holder shaft unit removal
1. Remove the Upper housing from the printer. (Refer to Section 4.3.1)
2. Remove the ASF unit from the printer (Refer to Section 4.3.5)
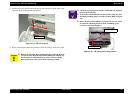
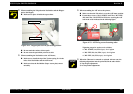
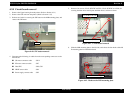
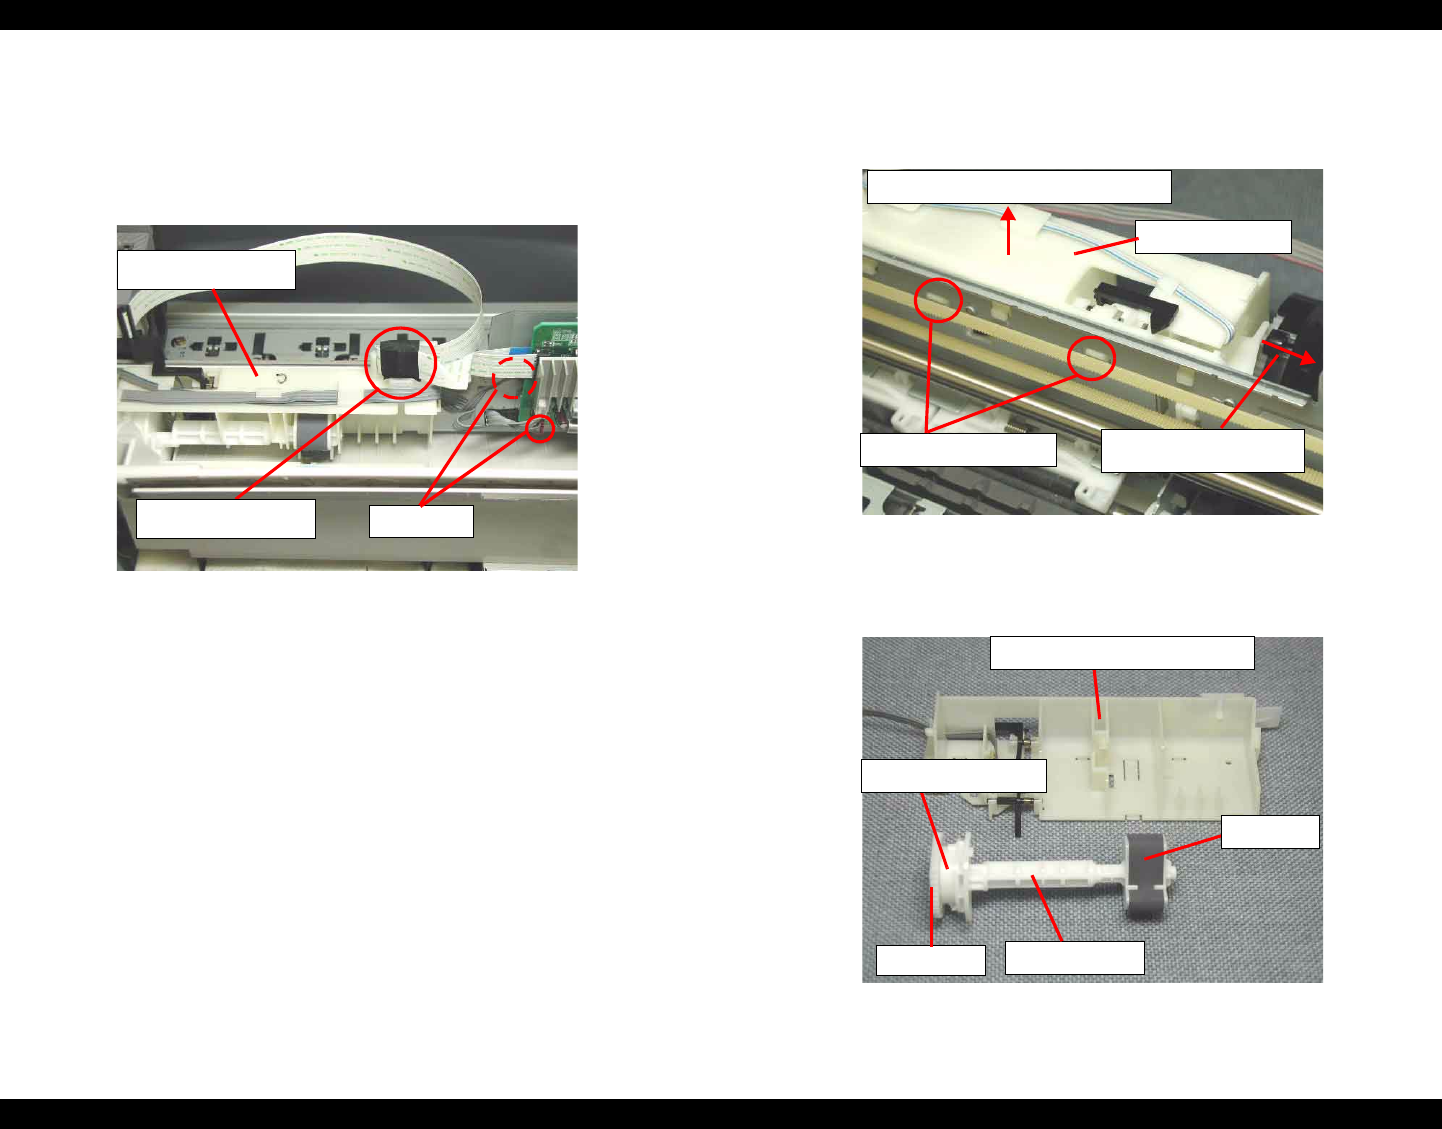
3. Release the Head FFC from the Spacer FFC on the LD roller shaft holder.
Figure 4-30. Head FFC removal
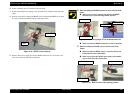
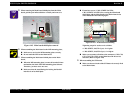
4. Disconnect the CR motor connector cable and the HP/PE Sensor cable from the
connectors (CN4, CN12) on the Main board.
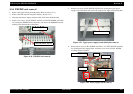
5. Release the CR motor connector cable from five hooks on the LD roller shaft
holder.
6. Release the Change lever toward the backside of the printer by using the tweezers,
and move the CR unit to the leftmost side (far side).
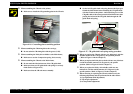
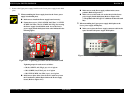
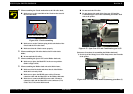
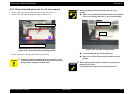
7. Push two hooks of the LD roller shaft holder, and pull the Holder shaft unit
upward slightly from the Main frame. (Step1, 2 in the Figure 4-31)
8. Move the Pump unit to the right side slightly while holing the whole of the Holder
shaft unit, and pull the bottom of the Holder shaft unit toward the backside of the
printer. (Step 3 in the Figure 4-31)
Figure 4-31. LD roller shaft holder removal
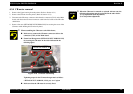
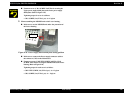
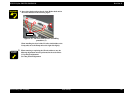
9. Remove the LD roller shaft along with the Clutch mechanism from the LD roller
shaft holder.
Figure 4-32. LD roller with Clutch mechanism removal
Connector
Spacer FFC
LD roller shaft holder
Step3) Move the Pump unit
to the right side
Holder shaft unit
Step1) Push two hooks
Step2) Pull the Holder shaft unit upward
Clutch mechanism
LD roller
LD roller shaft holder
LD roller shaft
Spur gear 35.2