


EPSON Stylus PHOTO 810/820/830 Revision B
Disassembly and Assembly Disassembly 93
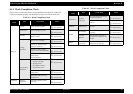
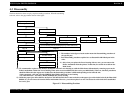
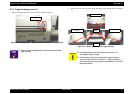
4.3 Disassembly
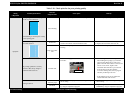
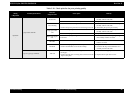
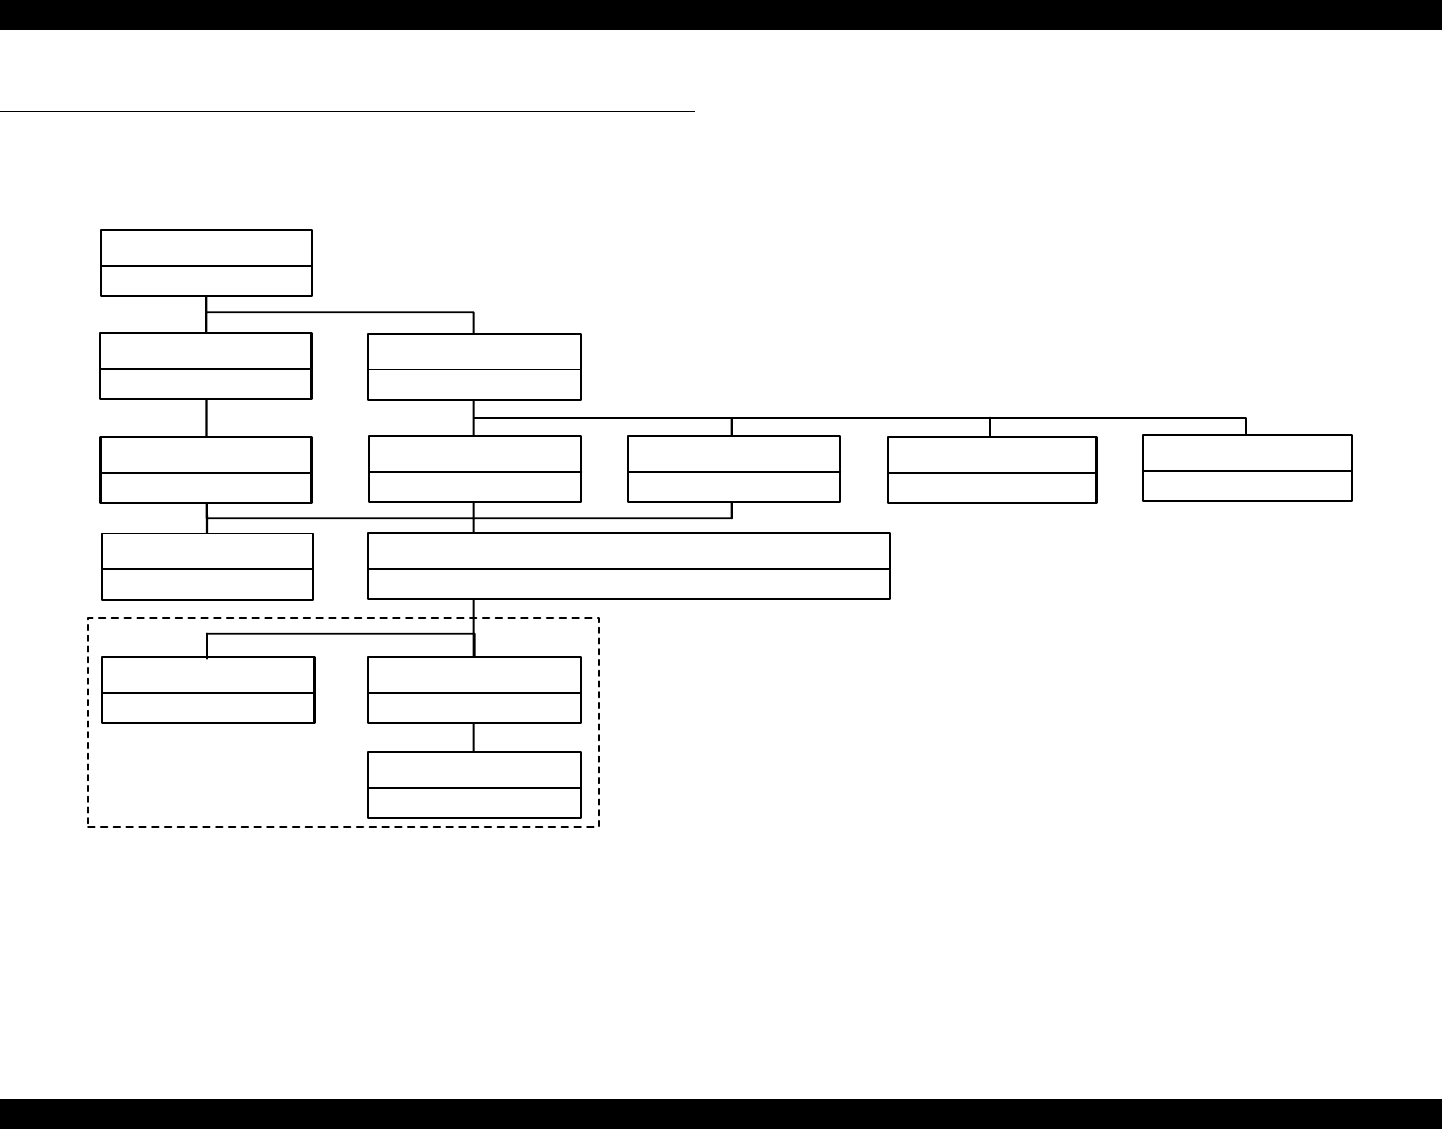
The flowchart below shows step-by-step disassembly procedures. When disassembling
each unit, refer to the page number shown in the figure.
Figure 4-3. Disassembling flowchart
Upper housing removal
ASF unit removal
Waste drain ink pad removal
Printhead removal
CR motor removal
PSB/PSE unit removal
Circuit board removal
CR unit removal
Holder shaft unit removal
*1) Lower housing removal (Including Paper eject roller removal *3)
PF roller removal
Ink system unit removal
PF motor removal
Page 114
Page 94
Page 96
Page 101
Page 104
Page 98
Page 111
Page 107
Page 115
Page 125
Page 123
Page 120
Page 102
*2)
* The numbers in the figure of each section means the disassembling procedure of
the specific part.
* Each disassembly procedure explains how to disassemble individual part in the
units.
*2) We recommend to replace to new Printer mechanism with the Lower housing to avoid the Main frame deformation by removing a part on the
Printer mechanism without the Lower housing (These units are not established for the service part individually). However, the these procedures
should be followed in the urgent case. In this time, the disassembly procedure is different depending on the removed unit.
* Ink system unit : ASF unit, CR unit, PSB/PSE unit, Holder shaft unit, Lower housing
* PF roller/PF motor : ASF unit, CR unit, PSB/PSE unit, Lower housing
*1) Only when you replace the Lower housing with new one, you can remove the
Printer mechanism from the printer. In this time, be careful not to deform the
Main frame.
*3) Unlike the paper eject roller shaft for the Stylus C50/C60/C61/C62, there is not two hooks on the paper eject roller shaft for the Stylus Photo 810/
820830. So, you can remove it from the Printer mechanism. However, you cannot replace it to new one because its roller shaft is not established
for service part.