


EPSON EPL-6200/EPL-6200L Revision A
Disassembly and Assembly Removal of Covers 144
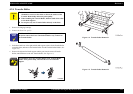
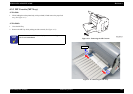
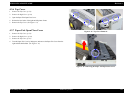
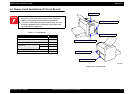
4.3.10 Lower Rear Cover
1.
Remove the Left Cover. (p.138)
2.
Remove the Right Cover. (p.139)
3.
Remove the Top Cover. (p.142)
4.
Remove the Paper Exit Cover. (p.143)
5.
Remove the Upper Rear Cover. (p.143)
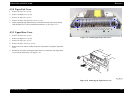
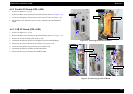
6. Remove the two screws securing the Lower Rear Cover, the one screw on the IF side
securing the High Voltage Unit (HV1) and the two screws securing the AC Inlet.
7. Release the two hooks by lifting the Lower Rear Cover, and remove the Lower Rear
Cover from the printer body.
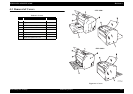
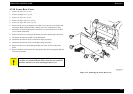
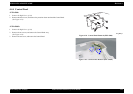
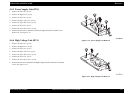
8. Remove the one screw securing the grounding wire on the High Voltage Unit (HV1).
9. Disconnect the connector (CN807) on the Main Board.
10. Disconnect the connector (CN3) on the Power Supply Unit (PU1).
11. Disconnect the connector (CN1) on the High Voltage Unit (HV1).
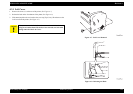
12. Remove the one screw securing the grounding wire of the AC Inlet to the printer
frame.
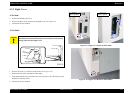
13. Remove the Power Switch at the side of the printer body while releasing the right and
left hooks (two hooks).
Figure 4-19. Removing the Lower Rear Cover
C A U T I O N
On the Rear cover, the High Voltage Unit (HV1) and Power Supply
Unit (PU1) are installed and thus many connectors are connected.
Therefore, take due care when removing the Rear Cover.