


EPSON EPL-6200/EPL-6200L Revision A
Disassembly and Assembly Removal and Installation of Major Components 153
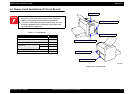
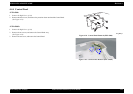
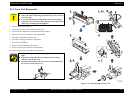
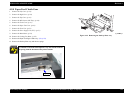
4.5.2 Fuser Unit Disassembly
1.
Remove the Fuser Unit. (p.152)
2. Remove the two screws, and separate the Fuser Unit.
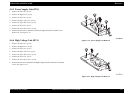
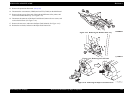
3. Remove the two shaft holders, and remove the Pressure Roller.
4. Remove the one screw, and remove the terminal board.
5. Pull out the Fusing Roller Heater Lamp.
6. Pull off the driving gear from the Fusing Roller.
7. Pull out the Fusing Roller.
8. Remove the four Fusing Separation Claws.
9. Remove the one screw, and remove the Thermistor.
10. Remove the two screws, and remove the Thermostat.
Figure 4-35. Disassembling the Fuser Unit
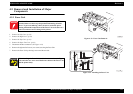
C A U T I O N
Do not touch the glass of the heater lamp with bare hands.
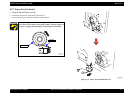
When you remove the Fusing Separation Claw, take care not to
lose the spring.
To avoid scratching the Fusing Roller surface by the Fusing
Separation Claw, keep the Fusing Separation Claw lifted when
removing or installing the Fusing Roller.
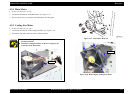
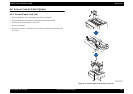
When installing the Thermistor, lead the harness as shown at
right.
Install the Fusing Roller Heater Lamp so that the voltage
indicator faces the gear side.
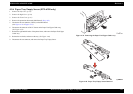
Install the shaft holder so that the groove in the shaft holder is
put on the rib of the Fuser Unit.