Installing the System
Installing Additional Components
Chapter 3
108
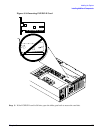
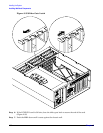
IMPORTANT When inserting the PCI/PCI-X card, be careful you do not accidentally touch an
Attention button on the other OLX dividers. This initiates an undesired shutdown of
another PCI/PCI-X card/slot. If you accidentally initiate slot shutdown, push the
Attention button again within five seconds to cancel the shutdown.
NOTE Ensure that you fully seat the card into the slot, or undesired results can occur after
power is reapplied to the slot.
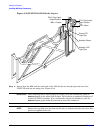
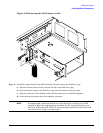
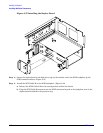
Step 11. If the PCI/PCI-X card is full size, close the slider gate latch to secure the end of the card.
(Figure 3-33)
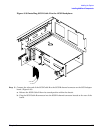
Step 12. Push the MRL down until it seats against the chassis wall.
Step 13. Turn the PCI/PCI-X card latch on the chassis to the closed position. This locks the PCI/PCI-X card
into its slot and the MRL into the closed position.
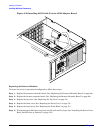
Step 14. Press the
Attention button. The power LED starts to blink.
Step 15. Wait for the power LED to stop blinking. The PCI/PCI-X card is now active.
Step 16. Reconnect all cables.
Step 17. Replace the top cover. (See “Replacing the Top Cover” on page 74.)
Step 18. Push the server all the way back into the rack until it stops.
Understanding LEDs and Hardware Errors
Table 3-12 describes the hot-pluggable LED error conditions.
Table 3-12 Hot-Pluggable LED Descriptions
Power LED (Green) Condition Description
On PCI/PCI-X slot is powered on
Blinking Hot-pluggable operation in progress. Do not touch the slot
Off PCI/PCI-X slot is powered off
Attention LED (Amber) Condition Description
On Hardware operational fault
NOTE: If the slot is powered on, it does not power off. If the
slot is powered off, it does not power on
Blinking Slot location is being indicated
Off If power to the slot is on, the slot is functioning normally


