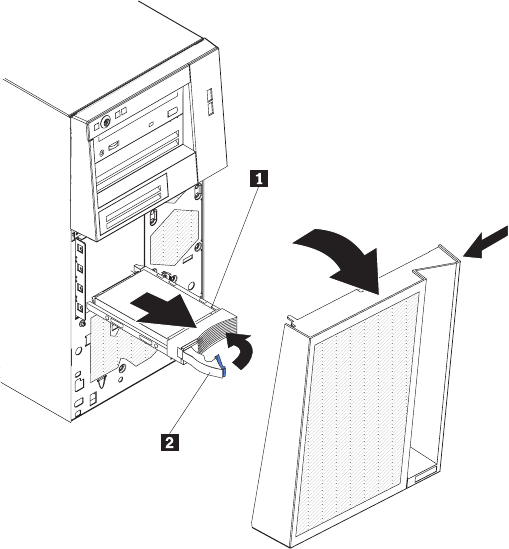
To remove a hot-swap hard disk drive, complete the following steps:
1. Read the safety information that begins on page vii and “Installation guidelines”
on page 29.
Note: You do not have to turn off the server to remove hot-swap drives from
the hot-swap drive bays.
2. Remove the lower bezel (see “Removing the two-piece bezel” on page 34).
3. Rotate the drive tray handle of the drive assembly that is to be removed to the
open position (based on your model).
1 Drive-tray assembly
2 Drive tray handle (in open position)
4. Grasp the handle of the drive assembly that is to be replaced and pull the
assembly out of the bay.
5. If you are instructed to return the drive assembly, follow all packaging
instructions, and use any packaging materials for shipping that are supplied to
you.
IDs for hot-swap hard disk drives
On some models, the hot-swap-drive backplane controls the IDs of the internal
hot-swap drive bays. The following table lists the IDs of the hard disk drives and
backplane that are connected to one channel in the hot-swap models. In the typical
configuration, the standard hard disk drives and backplane are connected to
channel A. This table applies only to server models that support four hard disk
drives.
50 ThinkServer TS200 Types 6522, 6523, 6524, 6525, 6526, 6528, 6529, and 6530: Installation and User Guide
