2-10 Getting Started
MA4000 Installation Manager User Guide - Revision 6
Step 18 Connect an ethernet cable between your laptop and the Ether1 jack on
the front of the MPS.
—You must use a crossover Ethernet
cable, not the more common
straight-through type.
Step 19 On your laptop, open the Network (or Network Connections) control
panel.
Step 20 Change your laptop’s network settings to the following:
IP Address: 192.168.0.5
Subnet Mask: 255.255.255.0
Default Gateway: 192.168.0.254
Step 21 Close the network control panel to save the new settings.
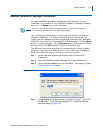
Step 22 Launch the Maintenance and Administration Terminal (MAT) by doing
one of the following:
—Open Installation Manager, then select MA
T... from the Tools menu.
—Locate the MAT application on your hard drive (if previously installed)
an
d launch it.
Step 23 Log on to the MPS using its default IP (192.168.0.1), leaving the user
and password fields blank.
Step 24 Enter the ADTM command in the MAT to display the default switch
configurations.
Step 25 Change the MPS’ IP address, subnet mask, and default gateway
address to the appropriate values for your network.
Step 26 Click Apply.
Even though the values appear to revert to their default values, they have in fact
been changed. This is because although you have changed their value in the MPS’s
memory, they have not yet been stored to the flash card.
Step 27 Enter the SINZ command in the MAT, then select System Initialize
(Reboot).
Step 28 Click Execute. A confirmation dialog displays.
Step 29 Click Yes. The MPS reboots.
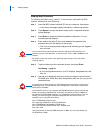
—During this time the AC
T light flashes GREEN and the Load light is
RED.
—The MPS is not ready until the ACT light remai
ns solid GREEN.
Step 30 Change your laptop’s TCP/IP network settings back to their original
values for use on your network.
NOTE


