Getting started_ 4
Installation and Install Software Only. The Custom
Installation allows you to select the machine’s connection and
choose individual components to install. The Install Software
Only allows you to install the supplied software, such as Smart
Panel. Follow the instruction in the window.
•Admin
istrator Installation provides convenient installation
methods useful for administrators (See "Administrator’s Guide
(Windows only)" on page 1).
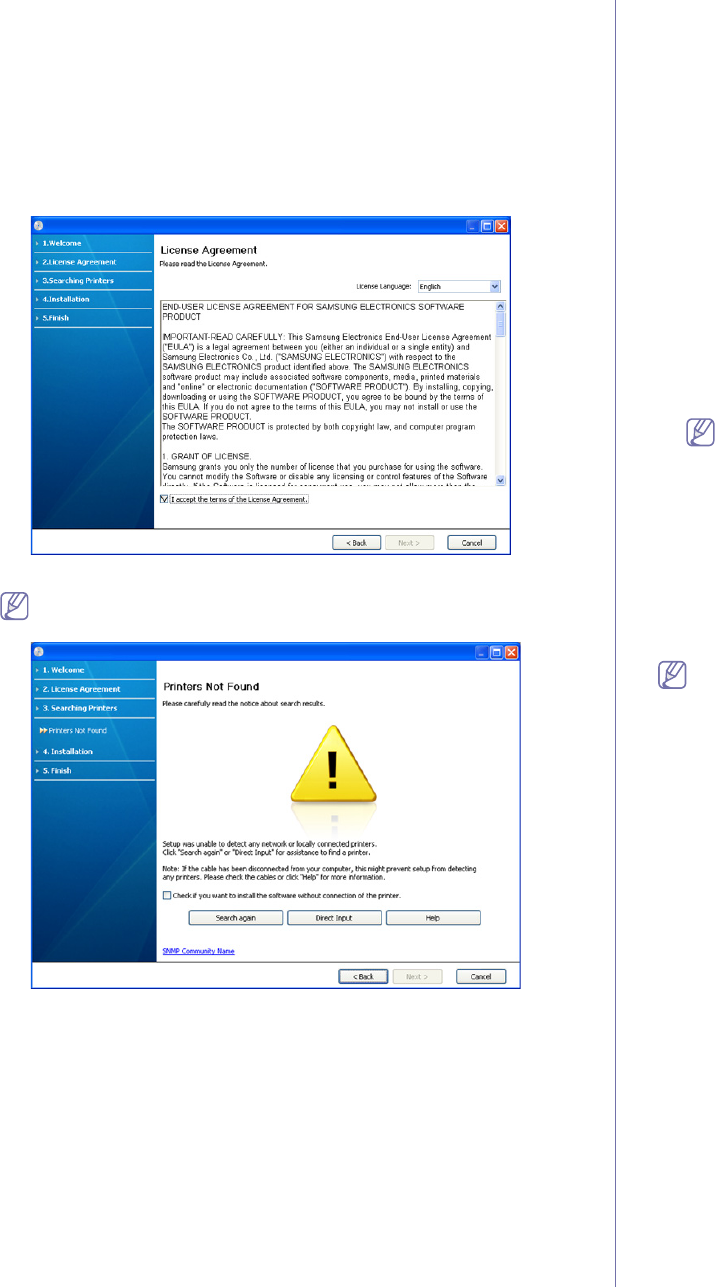
4. Read
License Agreement, and select I accept the terms of the
License Agreement. Then, click Next.
The program searches the machine.
If your machine is not found in the network or locally, the following
window will appear.
•Check if you want to install the software without connecting
the printer to the network or locally.
-Check this option
to install this program without a machine
connected. In this case, the print a test page window will be
skipped, and completes the installation.
•Se
arch again
When you press this button,
the firewall notice window
appears;
-Tu
rn off the firewall and Search again. For Window operating
system, click Start > Control Panel > Windows Firewall,
and inactivate this option. For other operating systems,
refer to their guide.
-Tu
rn off the firewall from the third party's program beside the
operating system. Refer to the manual provided by
individual programs.
•Direct Inp
ut
The Di
rect Input allows you to search for a specific machine
on the newtwork.
-S
earch by IP address: Enter the IP address or the host
name. Then click Next.
To verify your machine’s IP address, print a network
config
uration report (See "Printing a machine report" on
page 1).
-Se
arch by network path: To find a shared machine (UNC
Path), enter the shared name manually or find a shared
printer by clicking the Browse button. Then click Next.
•Help
If your machine is not connected
to the computer or network,
This help button gives detailed information about the how to
connect the machine.
5. The
searched machines will be shown on the screen. Select the one you
want to use and click Next.
When the driver finds only one machine, the confirmation window
appears.
6. After the installation is finished, a window asking you to print a test page
appears. If you want to print a test page, click Print a test page.
Otherwise, just click Next and skip to step 8.
7. If
the test page prints out correctly, click Yes.
If not, click No to r
eprint it.
8. T
o register as a user of the machine in order to receive information from
Samsung, click On-line Registration.
9. Click Fi
nish.
If the printer driver does not work properly, follow the steps below to
repair or reinstall the driver.
a)Make sure that
the machine is connected to your computer and
powered on.
b)Fro
m the Start menu, select Programs or All Programs >
Samsung Printers > your printer driver name > Maintenance.
c)Sele
ct the option you want, follow the instruction on the window.
Macintosh
The software CD that came with your machine provides you with the PPD
file that allows you to use the CUPS driver or Apple LaserWriter driver (only
available when you use a machine which supports the PostScript driver) for
printing on a Macintosh computer.
1. Make sure that the machine is connected to your computer and powered
on.
2. Inse
rt the supplied software CD into your CD-ROM drive.
3. D
ouble-click the CD-ROM icon that appears on your Macintosh desktop.
4. D
ouble-click the MAC_Installer folder.
5. D
ouble-click the Installer OS X icon.
6. En
ter the password and click OK.
7. T
he Samsung Installer window opens. Click Continue.
8. R
ead the license agreement and click Continue.
9. Click Agre
e to agree to the license agreement.
10. Select Ea
sy Install and click Install. Easy Install is recommended for
most users. All components necessary for machine operations will be
installed.
If you select C
ustom Install, you can choose individual components to
