


Sample Configurations 277
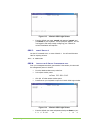
Use the CLI command again to configure the iSCSI portal for the inactive IP
address on Eth 2 to allow iSCSI communications via this IP on VSwitch1 in the
event of VSwitch2 failover.
iscsi portal create –ip 212.199.43.75 –p 5003
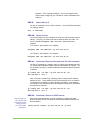
STEP 13. C
ONFIGURE V-SWITCH 2 NETWORK PORT ETH 1 IP ADDRESSES
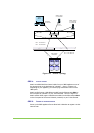
Use the CLI command ip config set to configure the network port Eth 1
for communications between VSwitch2 and the host stations on VSwitch2. Set
the IP address as active (1) to allow read/write commands to pass through this
IP address.
ip config set –if eth1 -ip 212.199.43.75 –im
255.255.255.0 –act 1
Now, use the CLI command ip config set to configure the IP takeover
address for Eth 1. This IP address will be the IP address of Eth 1 on VSwitch1.
The address will sit inactive (2) unless V-Switch 1 goes offline. Then VSwitch2
will activate (1) this address and direct all read/write commands to this address
through Eth 1 on VSwitch2.
ip config set –if eth1 -ip 212.199.43.56 –im
255.255.255.0 –act 2
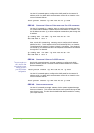
STEP 14. C
ONFIGURE V-SWITCH 2 ISCSI PORTALS
The port number you
set in the CLI must
coincide with the port
number you set in
your iSCSI initiator
configuration.
Use the CLI command iscsi portal create to configure the iSCSI
portal on network port Eth 1 for iSCSI communications between the V-Switch
and the host stations.
iscsi portal create –ip 212.199.43.75 –p 5003
Use the CLI command again to configure the iSCSI portal for the inactive IP
address on Eth 1 to allow iSCSI communications via this IP on VSwitch2 in the
event of VSwitch1 failover.
iscsi portal create –ip 212.199.43.56 –p 5003
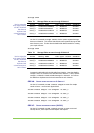
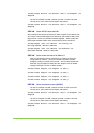
STEP 15. C
HECK STORAGE DEVICES
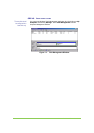
Use the CLI command storage show to list the system-registered storage
devices on VSwitch1. This ensures that all disks were registered during the disk
auto-discovery scan. This also lists the default disk aliases needed for creating
your simple volumes.