


36 SANRAD V-Switch User Manual
Surface Mounting
The V-Switch 3000 chassis is manufactured with four chassis feet. The V-
Switch 3000 is ready to be mounted on any secure flat surface. If you plan
to rack mount the V-Switch 3000, continue with “Rack Mounting.”
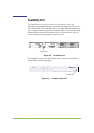
Rack Mounting
The V-Switch 3000 chassis can be mounted on a 19-inch rack.
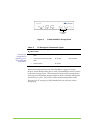
The V-Switch 3000 is shipped with an accessory packet of hardware. This
packet includes two L-brackets, two rear mounts (one left and one right)
and ten bracket screws for mounting the L-brackets.
You need the following tools to rack-mount the V-Switch 3000:
A Philips screwdriver suitable for L-bracket screws
Eight rack-post screws (and clips if necessary) suitable for the
equipment rack; four for the front mounts and four for the rear
mounts
A screwdriver suitable for the rack-post screws
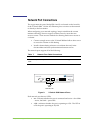
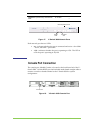
STEP 1. A
TTACH THE REAR MOUNTS
Using screws that you provide, attach the rear mounts to the back mounting
posts so that the length of each mount is parallel to the floor and extends
forward into the rack space.
The lip of each mount is at the bottom and facing inward toward the opposite
rear mount.
The rear of the V-Switch 3000 will be supported from underneath on these lips.
STEP 2. PLACE THE V-SWITCH 3000 RIGHT SIDE UP ON A SECURE FLAT
SURFACE NEAR THE RACK
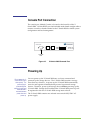
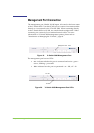
STEP 3. A
TTACH THE L-BRACKETS ON BOTH SIDES OF THE CHASSIS
Use the ten screws included in the accessory packet to attach the L-brackets to
the chassis.
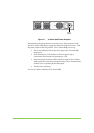
STEP 4. INSERT THE V-SWITCH 3000 INTO THE RACK
This step works best
with two people.
This step works best with two people: one at the rear of the rack coordinating
the V-Switch/mount connection and one at the front of the rack inserting the V-
Switch.