


50 SANRAD V-Switch User Manual
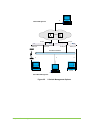
After configuring the console, you can now log in to the V-Switch using
your installed terminal emulation application and configure the basic V-
Switch parameters. You will then be able to manage the V-Switch via the 1
Gb Ethernet port, Eth1 (in-band) or the 10/100Mb management port (out-
of-band). Continue with “Initializing the V-Switch”.
Initializing the V-Switch
Before you can begin managing your storage pool, you must initialize the
V-Switch. This includes assigning a name to the V-Switch; an IP address
and mask for the management port and a TCP/UDP port for SNMP
communications. Use the CLI command init to initialize the V-Switch.
If you have configured the V-Switch 3000 management IP address via LCD,
you can open a Telnet session and log in to the V-Switch remotely to
initialize it. If you have not configured the V-Switch 3000 management IP
address or you are working with a V-Switch 2000, you can log in to the V-
Switch locally via the RS232 serial connection established in the last section
and initialize it.
Access to the V-Switch is password protected. The V-Switch ships with the
default user name sanrad and the default password sanrad. After logging
in, a total of ten user names with passwords can be configured on a V-
Switch. The default user name and password sanrad can be maintained or
removed. The user name can have from one to twenty characters. The user
password can have from six to twelve characters. Both fields are case
sensitive and accept all characters, including spaces.
STEP 1.
OPEN A TELNET SESSION (REMOTE MANAGEMENT ONLY)
From the Windows Start menu, select Run.
In the Open window, enter:
telnet 212.199.43.46
Click OK. A Telnet session window opens.
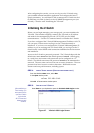
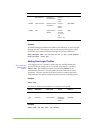
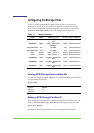
STEP 2. LOG IN TO THE V-SWITCH
After establishing a
Telnet session, you
must press Enter to
open the V-Switch
Login window.
All CLI names and
aliases are case
sensitive.
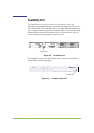
Press Enter on your keyboard to open the V-Switch 3000 Login window.
Figure 27. V-Switch 3000 Login Screen