Chapter 4 Maintaining the Sun Fire V40z Server 4-71
8. Disconnect the cables from the assembly.
9. Remove the cables from the bay and chassis.
10. Feed the new cables through the empty bay, with the end labelled "Motherboard"
toward the rear of the chassis.
11. Connect the new cables to the assembly.
12. Slide the assembly back into the bay, while pulling the cables back into the
chassis through the rear opening of the bay.
13. Push the assembly in until the latch clicks into the front panel.
14. Re-seat the service loop for the flat cables into the plastic retainer clip on the
chassis wall.
If you have no other cables to replace, jump to “Repositioning the Cables” on
page 4-72. Otherwise, continue in the procedure with your next type of cable.
Operator-Panel Board Cable and USB Cable
Note – There are two separate cables that connect to the rear of the operator-panel
board: the operator-panel cable and the USB cable.
1. Remove the metal PCI bracket guide. Unscrew the two screws that fasten the PCI
bracket guide to the motherboard and server chassis. Lift the bracket guide up and
out of the chassis.
This bracket guide keeps full-length PCI cards in place.
2. Slide the plastic air baffle up and off from the base of fan 12.
Note – For the front fans, the fan numbers are imprinted on the main air baffle that
normally sits on top of the front fan-cage assembly.
3. Remove fan 12. Squeeze the retainer clip on the edge of the fan, then pull the fan
straight up to disengage its connector and remove it from the fan cage.
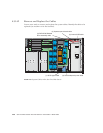
4. Disconnect the operator-panel cable (4) and the USB cable (5) from the
motherboard (by the vertical PCI slots).
5. Remove the service loop for the flat cables from the plastic retainer clip on the
chassis wall. Remove the USB cable from its plastic retainer clips.


