Chapter 3 Maintaining the Sun Fire V20z Server 3-41
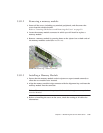
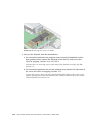
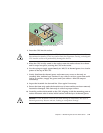
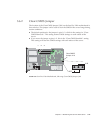
FIGURE 3-34 Installing a CPU in its Socket
4. Insert the CPU into the socket.
Caution – If correctly aligned, the CPU should easily insert into the socket. If more
than minimal resistance is felt, stop and recheck the alignment. Forcing a misaligned
CPU into the socket will permanently damage the device.
5. When the CPU is fully seated in the socket, rotate the socket release lever down
until it snaps into place, securing the CPU in the socket.
6. Use the syringe to apply approximately 0.1 ML/CC of thermal grease in a circular
pattern to the top of the CPU.
7. Gently distribute the thermal grease and remove any excess so that only an
extremely thin, uniform layer remains. If any voids or crevices appear that could
lead to air pockets, reapply the grease until you achieve a thin but compact
consistency.
8. Inspect the heatsink for dust and lint. Clean again if necessary.
9. Ensure the foam strip under the heatsink area is intact and has not been removed,
loosened or damaged. This foam strip is critical to proper air flow.
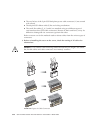
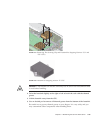
10. Carefully position the heatsink on the CPU, aligning it with the mounting posts to
reduce movement after it makes initial contact with the layer of thermal grease.
Caution – If the heatsink is moved too much during its installation, the layer of
thermal grease may become uneven, leading to component damage.


