


24
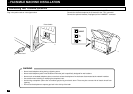
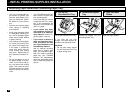
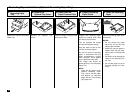
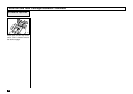
Remove the Optional Recording
Paper Tray.
Remove the Optional Tray
Cover.
Remove the
Optional Tray Cover
2
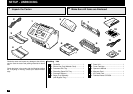
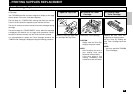
Recording Paper Installation (Optional Recording Paper Tray)
73 74
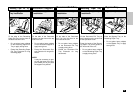
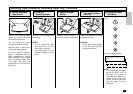
Prepare new recording paper
sheets by holding both ends
and flexing several times.
This will separate the sheets
and provide optimum feeding.
Align the stack so that all four
corners are neatly aligned.
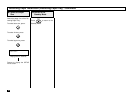
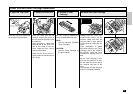
Be sure to load the recording
paper in accordance with any
paper manufacturer’s printing
side instruction. Some papers
have a preferred image side.
This image side should be
placed face up in the Recording
Paper Tray.
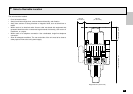
NOTE:
There are two types of the
Optional Recording Paper
Tray, one for A4-size paper
and another for letter-size
paper. Use the Tray meeting
your paper size.
32
Prepare Recording
Paper Sheets
4
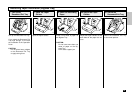
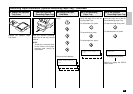
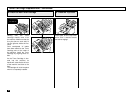
Press the Paper Pressure Plate
down until it clicks.
75
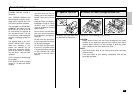
Place the recording paper stack
into the tray.
NOTES:
• Do not exceed the upper
stack limit line as this may
cause paper misfeeds.
• Make sure that the paper is
seated under the two sepa-
ration claws on the back side
of tray.
• Be careful not to damage the
claws of the Recording Pa-
per Tray.
• Do not add paper on top of
the paper already in the ma-
chine.
76
Press Down the
Paper Pressure Plate
3
Install the Recording
Paper
5
Remove the Optional
Recording Paper
Tray
1