


67
Alternate Numbers are optional.
If the remote location does not
have two or more facsimile units
in the same area, you can leave
this entry blank. (See page 65
for more information.)
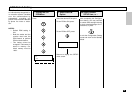
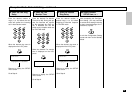
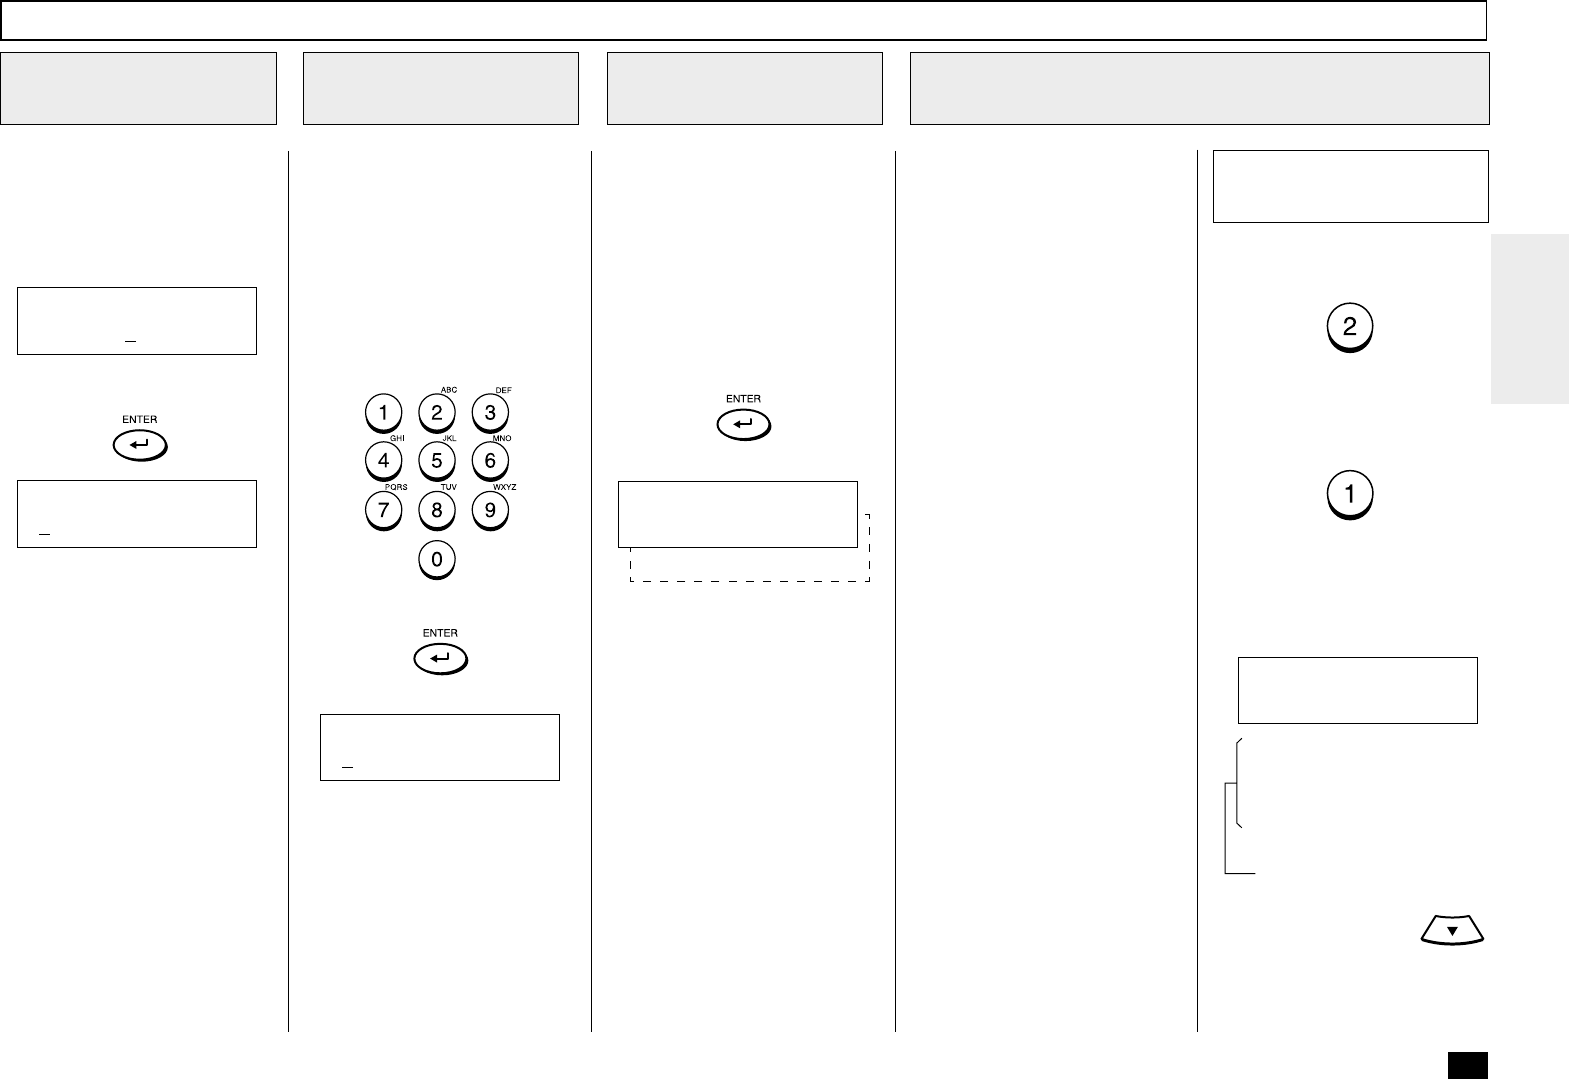
Enter the Alternate Facsimile
Number.
Then press:
Enter an Alternate
Number (Optional)
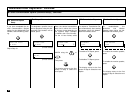
7
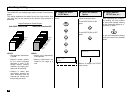
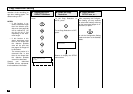
The telephone number is dis-
played on the bottom row of the
LCD display as you enter it.
Confirm that the number is cor-
rect.
Enter the Telephone
Number - continued
6
Abbreviated Dialer Registration - continued
Then press:
FAX NUMBER (MAX128)
[9583359 ]
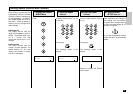
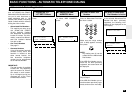
Enter the Location ID name of
the remote party to be assigned
to the current Abbreviated Dial
Number.
See page 36 for more informa-
tion on Character Entry.
When the name is displayed
correctly on the LCD display,
press:
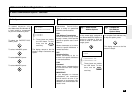
Enter the Location
ID Name
8
ALT NUMBER (128 MAX)
[ ]
NAME (20 MAX)
[ ]
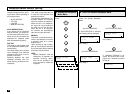
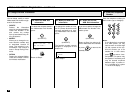
To skip the Communication Op-
tions, press:
Go to next step.
To select Communication Op-
tions, press:
When “1.YES” is selected, the
FAX OPTIONS screen appears.
Follow the next steps for each
item selection.
This setting will allow you to
specify one or more of the fol-
lowing Communication Options
for the Abbreviated Dial Number
you are registering.
Delayed Communication
Default=off
Select to program a trans-
mission start time.
Transmission Report
Default=off
Enables or disables the
printing of a TX Report.
Line Monitor
Default=off
Enables or disables the line
monitor speaker during dial-
ing.
Fax Speed
Default=off
Selects a lower modem
speed for poor communica-
tion links.
Sub Address
Default=none
Specifies a Sub Address for
the Abbreviated Dial Number
being registered. The remote
unit must support Sub-Ad-
dress capabilities.
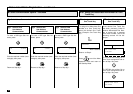
Select the
Communication
Option
9a
Select Communication Options
(Advanced Setup)
9
1.YES
FAX OPTIONS
2.NO
These items are outside
the LCD frame. To view
them, use the
scroll key.
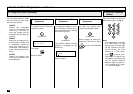
FAX OPTIONS
1.DONE
2.DELAYED COMM.
3.TX REPORT
4.LINE MONITOR
5.FAX SPEED
6.SUBADDRESS