


5
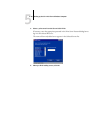
5-28 Setting up the GA-1120 from a Windows Computer
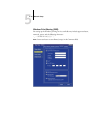
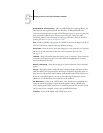
Outgoing Mail Server—Specify the IP address or server name that communicates the
appropriate mail server and contact information to the GA-1120.
NOTE: Both an Incoming and Outgoing mail server must be defined. If an Outgoing
mail server is not defined, the e-mail service assumes that the incoming and outgoing
server names are the same.
Timeout (seconds)—Specify the maximum amount of time that will elapse as the
GA-1120 attempts to connect to the mail server.
Polling Interval—Specify how often the GA-1120 checks the mail server for relevant
e-mail.
Attachment Maximum Size—Specify the maximum file size of a scan for the GA-1120
to send as an attachment. If the scan file exceeds this maximum, the file will
automatically be sent as a URL.
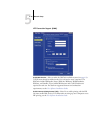
Mailbox Account Name—Enter the mailbox name specified on the mail server.
This name tells the Fiery client mail service which account contains e-mail messages
for the GA-1120.
NOTE: The account name entered in this field must first be specified on the mail server
by the administrator.
Fiery E-mail Address—Enter the name of the e-mail account. For example,
pat@test.com.
Password—Enter a password for accessing the mailbox account on the mail server.
Verify Password (remote setup only)—Reenter your password.
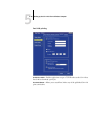
Administrator E-mail Address—Enter the user name specified in GA-1120 setup.
The administrator authorizes a unique e-mail address to remotely administer e-mail
services. If an error occurs while you are executing a scan to e-mail, the e-mail service
sends an error message to the Administrator E-mail Address specified. The
administrator can authorize additional administrator e-mail addresses from this e-mail
address.