


7
7-10 Administering the GA-1120
Printing a Configuration page from the Control Panel
The Configuration page lists all the settings in effect from the current Setup.
After you have finished running Setup, print a Configuration page to confirm your
settings. The Configuration page can also be printed from Command WorkStation
(for details, see page 5-32).
After you make changes to Setup and choose Exit Setup, the GA-1120 reboots. This
allows the GA-1120 to recognize the new settings and display them properly on the
Configuration page. Allow the GA-1120 to restart and return to Idle before printing a
Configuration page. In particular, the restart is necessary if you specified the DHCP,
BOOTP, or RARP protocol to obtain an IP address automatically for the GA-1120.
Post the current Configuration page near the server for quick reference. Users need the
information on this page, such as the current printer default settings.
Other pages you can print from the Control Panel of the GA-1120 or from
Command WorkStation include the Test Page, Font List, E-mail Log, Job Log,
Control Panel Map, and PANTONE, CMY, and RGB color charts. For information
on these pages, see the Job Management Guide.
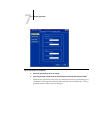
TO PRINT THE CONFIGURATION PAGE
1. At the Control Panel, press the Menu button to access the Functions menu.
2. Scoll to Print Pages. Press Set.
3. Choose Configuration. Press Set.