Scan to PC
127
NOTE: If Remote Authentication has been enabled, a popup message will prompt the
user to enter a login ID and password before using the Scan to PC service. The login
ID and password will be passed to the Kerberos server. Only when the user has been
authenticated, the feature will be made available.
Address Book
This feature allows you to select a destination server from the Address Book. For
information on how to register destinations, refer to the Setups chapter in the System
Administration Guide.
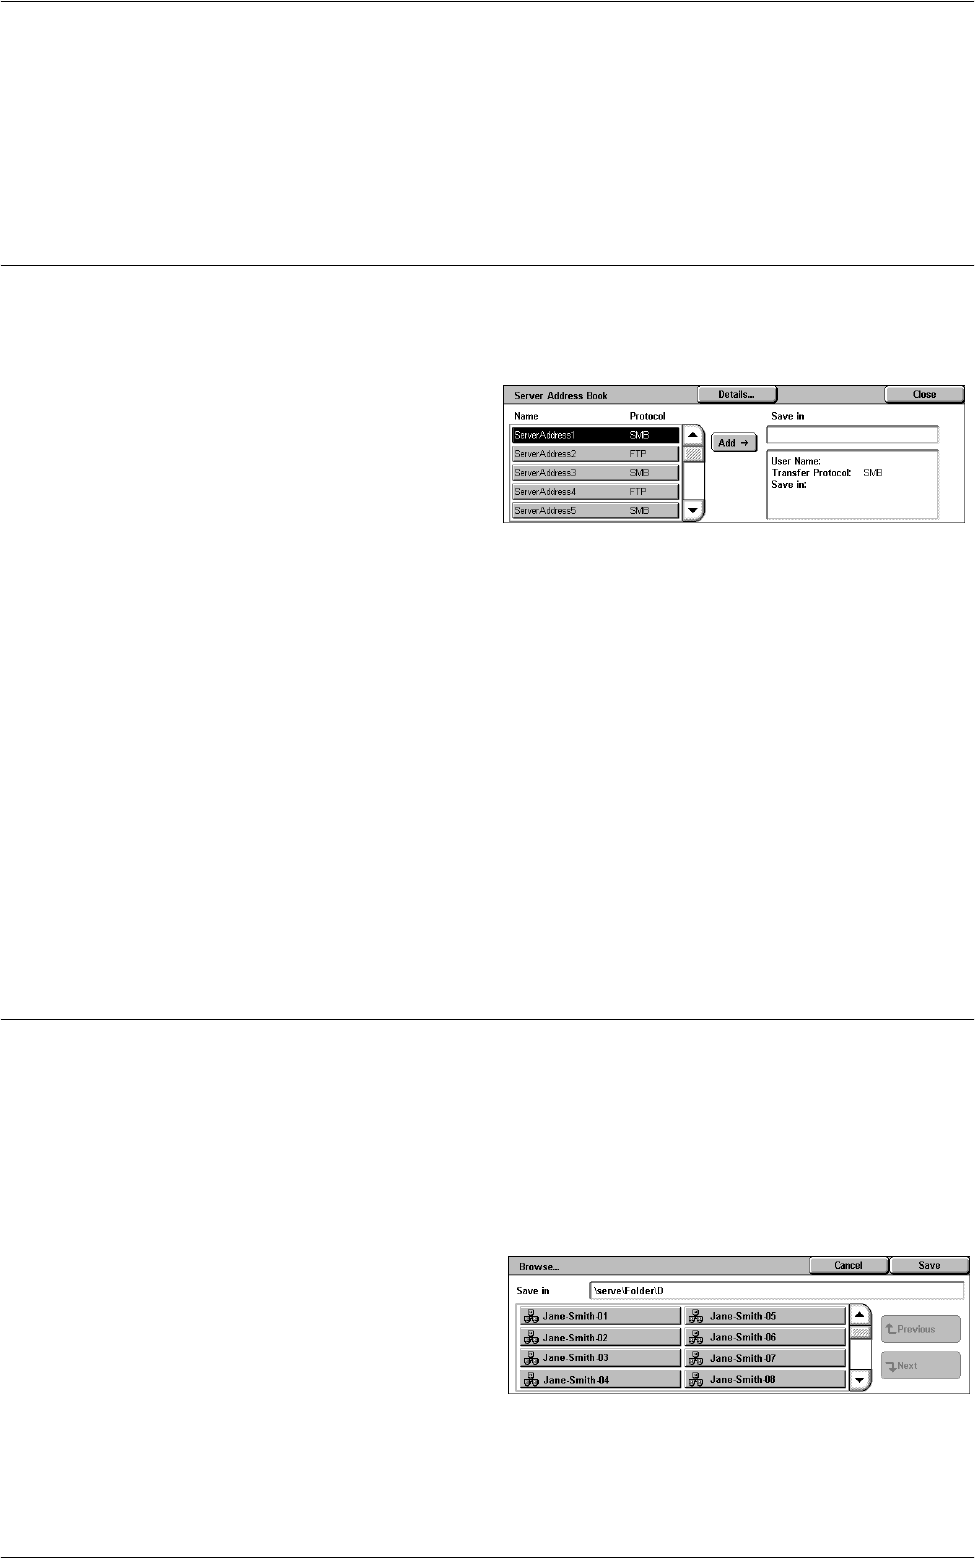
1.
Select [Address Book] on the
[Scan to PC] screen.
2.
From the Address Book list,
select a destination server, and
then select the [Add J] button.
3.
Select [Close].
Name/Protocol
Displays the destination server information registered in the Address Book.
Details
Displays the detailed settings of a selected server.
Add J
Adds a selected destination server to the [Save in] field.
Save in
Displays a selected destination server and its details.
Browse
This feature allows you to select a location on the network to save a scanned
document. Browsing starts at the workgroup level, proceeds to the server level, and
then to multiple hierarchical levels of shared folders.
NOTE: The [Browse] button is grayed out and cannot be selected when [FTP] is
selected for [Transfer Protocol]. This button does not appear when an IPv4 address is
not assigned to the machine. For details on the protocol settings, refer to the Setups
chapter in the System Administration Guide.
1.
Select [Browse] on the [Scan to
PC] screen.
2.
Select the required options.
3.
Select [Save].
Previous
Retraces one step up in the hierarchy.


