Faxing
WorkCentre 7755/7765/7775 Multifunction Printer
User Guide
141
Faxing from Your Computer
A document stored on your computer can be sent as a fax using the printer driver.
Note: To fax from your computer, fax must be installed in the printer and enabled by the
system administrator.
Sending the Fax
1. With the document open in your application, access the Print dialog box.
• Windows: CTRL+P for most applications.
•Macintosh: CMD+P for most applications.
2. Select the printer.
3. Select printer features.
• Windows: Click the Paper/Output tab.
• Macintosh: Click Copies & Pages, then click Xerox Features.
4. Click the Job Type menu, then select Fax.
5. In the Fax window, click Add Recipients.
6. Enter the recipient’s name and fax number. If desired, complete the additional information.
7. If desired, click Save to Personal Phonebook to save the recipient information.
8. Click OK.
9. Send the fax.
• Windows: Click OK.
• Macintosh: Click Print.
For details, click the Help button in the Fax window.
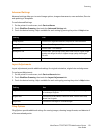
Including a Cover Sheet
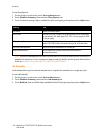
1. In the Fax window, click Cover Sheet.
2. Click the Cover Sheet Options menu, then select Print a Cover Sheet.
3. In the Cover Sheet window, make the desired selections from the Recipient Information and
Sender’s Information menus.
4. If desired, complete the additional information.
5. To include an image, such as a company logo or background text, on the fax cover sheet, click the
Cover Sheet menu, then click New.
6. In the Cover Sheet Image Editor window, enter a name for the cover sheet, then click the Options
menu and select either Text or Picture. For text, enter the desired text. For a picture, click Choose
File, then locate the desired picture file.
7. Click OK twice.
For details, click the Help button in the Fax window.


