AT-S63 Management Software Menus User’s Guide
Section IV: SNMPv3 367
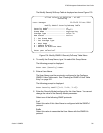
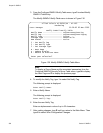
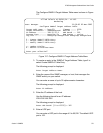
The Configure SNMPv3 Notify Table menu is shown in Figure 135 on
page 365.
Note
To display a Group Name and its associated parameters from the
Configure SNMPv3 SecurityToGroup Table menu, type N to display
the Next Page and P to display the previous page.
3. To delete an SNMPv3 Notify Table entry, type 2 to select Delete
SNMPv3 Table Entry.
The following prompt is displayed:
Enter Notify Name:
4. Enter a Notify Name.
The following prompt is displayed:
Do you want to delete this table entry? (Y/N):[Yes/No]->
5. Enter Y to delete the SNMPv3 Notify Table entry or N to save the entry.
6. After making changes, type R until you return to the Main Menu. Then
type S to select Save Configuration Changes.
Modifying an
SNMPv3 Notify
Table Entry
This section describes how to modify parameters in an SNMPv3 Notify
Table entry. See the following procedures:
“Modifying a Notify Tag” on page 367
“Modifying a Notify Type” on page 369
“Modifying a Storage Type” on page 370
Modifying a Notify Tag
To modify the Notify Tag parameter in an SNMPv3 Notify Table entry,
perform the following procedure.
1. Display the Configure SNMPv3 Table menu by performing steps 1
through 3 in “Configuring the SNMPv3 User Table” on page 321. Or,
from the Main Menu type 5->5->5.
The Configure SNMPv3 Table menu is shown in Figure 126 on page
322.
2. From the Configure SNMPv3 Table menu, type 6 to select Configure
SNMPv3 Notify Table.
The Configure SNMPv3 Notify Table menu is shown in Figure 135 on
page 365.


