


Chapter 29: Internet Protocol Version 4 Routing Interfaces
550 Section VII: Internet Protocol Routing
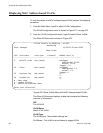
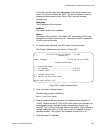
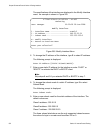
The following prompt is displayed:
Enter IP Address [STATIC IP|DHCP|BOOTP]:
8. Enter a static IP address for the new interface or enter “DHCP” or
“BOOTP” to activate the DHCP or BOOTP client.
Note
Skip steps 9 and 10 if you selected DHCP or BOOTP in step 8.
9. To change the default subnet mask for a static IP address, type 3 to
select Subnet Mask.
The following prompt is displayed:
Enter Subnet Mask:
10. Enter a subnet mask for the static address of the interface. The default
values are:
Class A address - 255.0.0.0
Class B address - 255.255.0.0
Class C address - 255.255.255.0
The three values listed above are the only supported values because
the value of a byte in a mask must be either 255 or 0.
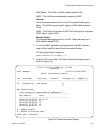
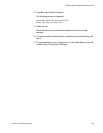
11. Type C to select Create Interface.
The following prompt is displayed:
Interface Created Successfully?
Press any key to continue...
12. Press any key.
The new interface is added to the Configure Interface menu and
immediately activated on the switch.
13. To create additional interfaces, repeat this procedure starting with step
4.
14. To permanently save your change, return to the Main Menu and type S
to select Save Configuration Changes.