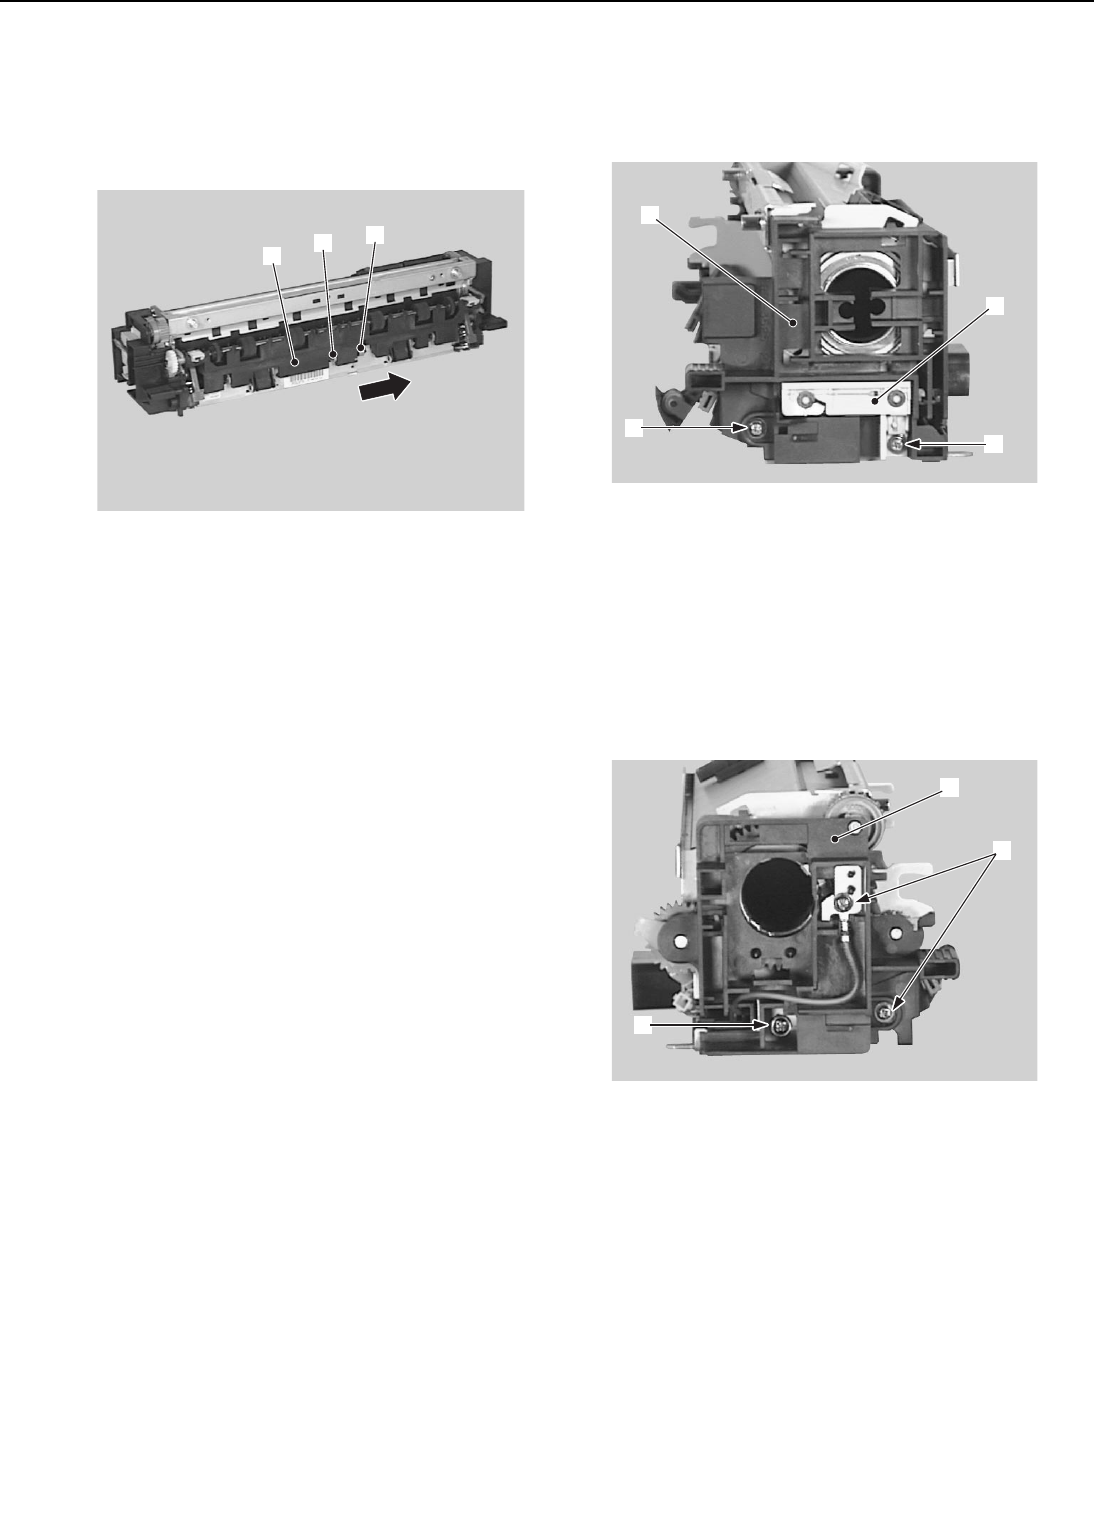
5) Remove the E-ring and the spring, then
pull out the separation lower guide
toward you and slide it off in the direc-
tion of the arrow.
➀ E-ring
➁ Spring
➂ Separation lower guide
Figure 3-4-15
6) Remove the fixing roller heater following
steps 2-5 on Page 3-18.
7) Remove the thermoswitch following step
3 on Page 3-25.
8) Remove the thermistor following steps
3-4 on Page 3-26.
9) Remove the screw and diode holder.
10) Remove the screw and the right fixing
cover.
➀ Screw ➁ Diode holder
➂ Screw ➃ Right fixing rcover
Figure 3-4-16
11) Remove the 2 screws (M3), stepped
screw, and then the left fixing cover.
12) Remove the 4 gears.
➀ Screws (M3) ➁ Stepped screw
➂ Left fixing cover
Figure 3-4-17
3 - 20
CHAPTER 3
➀
➁
➂
➃
➂
➀
➁
➁
➀
➂


