


4-45
Cisco CRS-1 Carrier Routing System 8-Slot Line Card Chassis Installation Guide
OL-6256-08
Chapter 4 Installing and Removing MSCs, PLIMs, and Associated Components
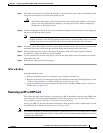
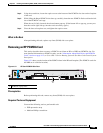
How to Install or Remove a PCMCIA Card
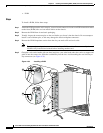
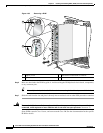
Step 2 Using the screwdriver, loosen the captive screw at the bottom of the PCMCIA slot door on the faceplate
of the card.
Step 3 While lifting the hinged PCMCIA slot door up, carefully insert the new PCMCIA flash card into the left
slot of the PCMCIA card cage.
When the card is fully inserted, the release button pops up. (If the button fails to pop up, you may not
have the card in right side up; turn the card over and try again.)
Step 4 Close the door to keep dust out, and tighten the captive screw.
What to Do Next
After performing this task, replace any front (PLIM) side cover plates.
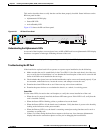
Removing an RP PCMCIA Card
This section describes how to remove a PCMCIA card from an RP or a DRP card PCMCIA slot. For
more detailed information on PCMCIA cards, see the
“Information About Hard Drives and PCMCIA
Cards” section on page 4-12, or Cisco CRS-1 Carrier Routing System 8-Slot Line Card Chassis System
Description.
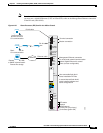
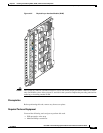
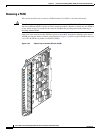
Figure 4-31 shows you the location of the PCMCIA door in the RP card faceplate. (The PCMCIA cards for
the DRP are in a similar location.)
Figure 4-31 RP Card PCMCIA Slot Door
Prerequisites
Before performing this task, remove any front (PLIM) side cover plates.
Required Tools and Equipment
You need the following tools to perform this task:
• ESD-preventive strap
• Medium Phillips screwdriver
1 PCMCIA flip-up door
CONSOLE
AUX
HDD
MGMNT ETH
CNTL ETH1
CNTL ETH0
PC CARD
CRS-16-RP
STATUS
PRIMARY
117417
1