


I
Stylus Color service Manual
Adjustments
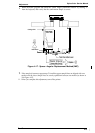
4. In
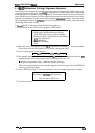
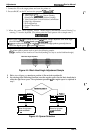
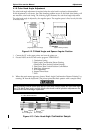
Figure 4-8, the vertical position is correct when both the magenta line and the black line are
aligned [as in position OK (0)]. If the vertical position is correct, turn off the printer.
If the black and magenta lines are not aligned, perform the vertical adjustment as described in
steps 5-10.
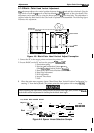
■
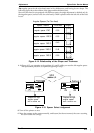
The number shown in the sample indicates the thickness level compared with the
current
linear spacer (see step 5), and the linear spacer is prepared with 11 kinds.
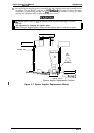
fl The linear spacer is fixed by two pieces at both sides of the base head. For this reason,
when you replace the linear spacer, replace the two linear spacers at the same time,
■
When replacing the linear spacer, place it under the angular spacer.
4
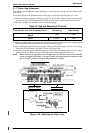
If necessary, replace the spacer linear. For instance, if your pattern is similar to the pattern shown
under -2, replace the spacer linear with a thinner linear spacer. If your pattern is similar to the
pattern shown under 2, replace the spacer linear with a thicker spacer.
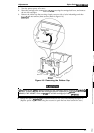
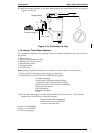
5.
Turn the printer off at once.
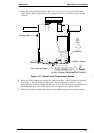
6. Move the carnage to the center while pressing the carriage lock lever, and remove the two ink
cartridges.
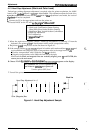
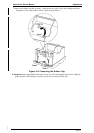
7.
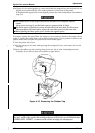
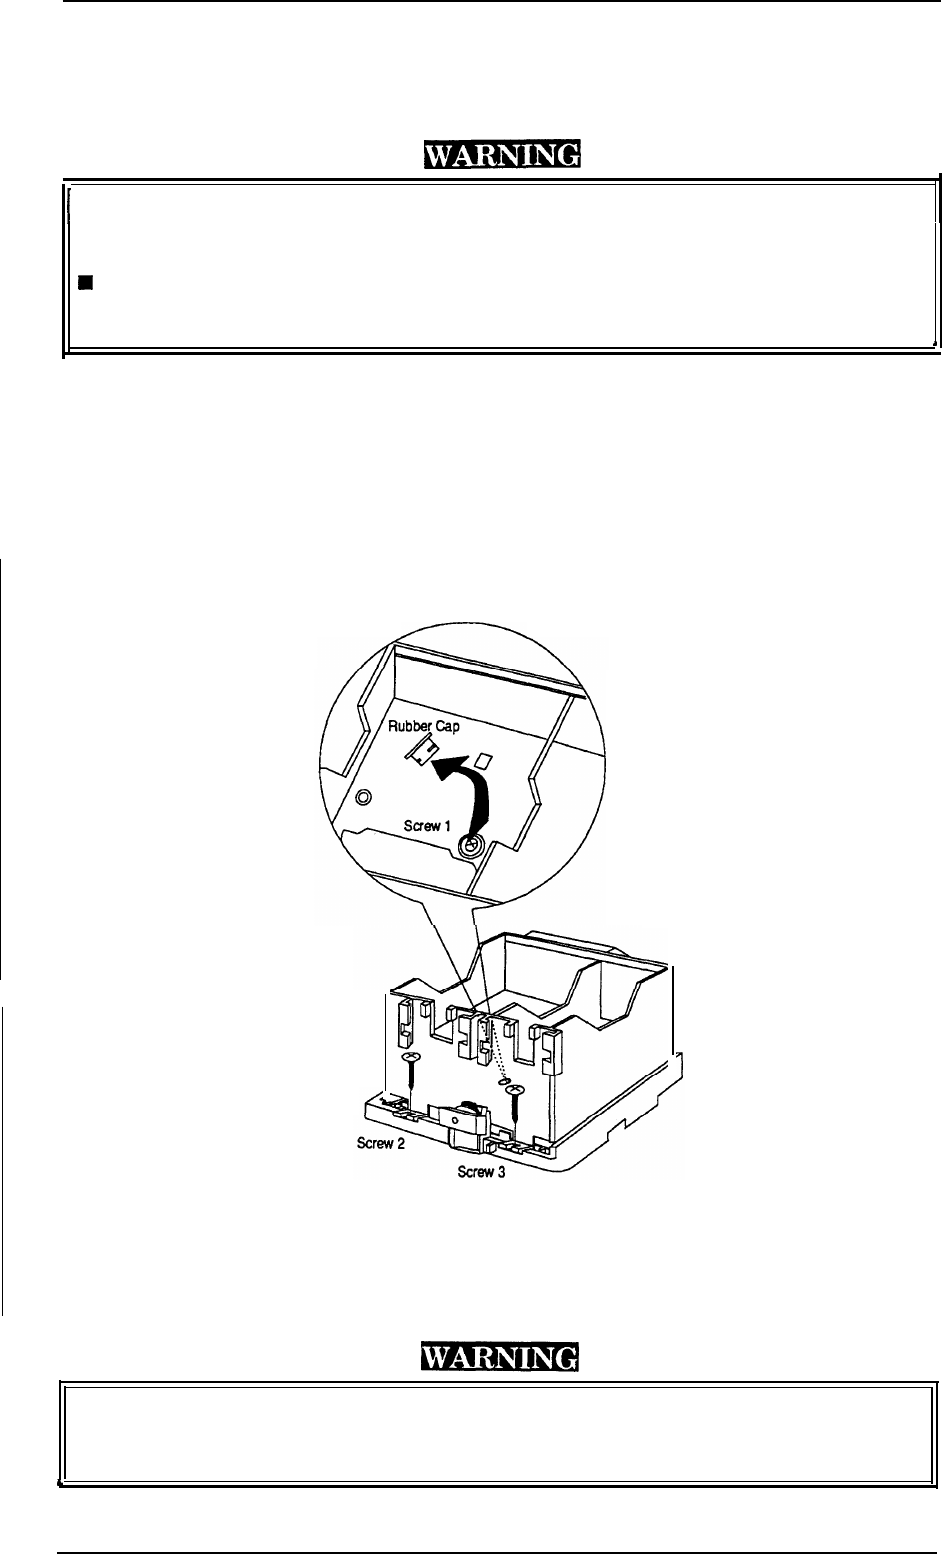
Remove the rubber cap that coveringa head screw at a side of color i.nkcartridge and then
Ioosen(but do not remove) three screws.(Refer to figure below.)
1
Figure 4-10. Removing the Rubber Cap
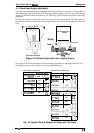
After replacing the spacer, always install new ink cartridges before returning the printer to
the user. At this time, use the ink cartridges that are exclusive for service (Monochrome:
1020626
1
CMY: 1020627).
You
can
re-use the old ink cartridges for otherpurposes.
$
I
4-10
Rev. D