


EPSON Stylus Photo 750 Revision A
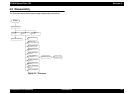
Disassembly and Assembly Disassembly 57
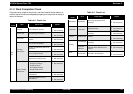
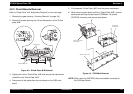
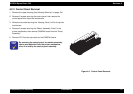
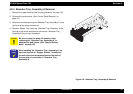
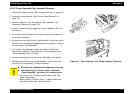
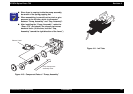
4.2.3 Control Panel Removal
1. Remove the upper housing.(See“Housing Removal” on page -54)
2. Remove 2 screws securing the control panel, then remove the
control panel from the printer mechanism.
3. Remove one screw securing the “Housing, Panel, Left” to the printer
mechanism.
4. Remove 2 screws securing the “Board, Assembly, Panel” to the
printer mechanism, then remove C209PNL board from the “Panel,
Assembly”.
5. Remove FFC from the connector on the C209PNL board.
Figure 4-5. Control Panel Removal
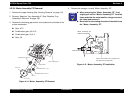
CHECK
POINT
By removing the control panel, the stacker assembly
can be also detached from the printer mechanism,
since it is held by the control panel assembly.