Servicing Motherboard Components 87
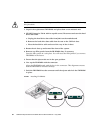
9. Place the FB-DIMM on an antistatic mat.
10. Repeat Step 7 through Step 9 for any other FB-DIMMs you intend to remove.
11. If you do not plan to install replacement FB-DIMMs at this time, install filler
panels in the empty slots.
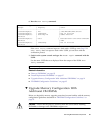
Related Information
■ “Install Replacement FB-DIMMs” on page 87
■ “Verify Successful Replacement of Faulty FB-DIMMs” on page 89
▼ Install Replacement FB-DIMMs
Before beginning this procedure, ensure that you are familiar with the information
provided in these topics:
■ “Preparing to Service the System” on page 57
■ “FB-DIMM Configuration Guidelines” on page 95
Note – If the server is already extended and open, begin the procedure at Step 4.
1. Extend the server to the maintenance position.
See “Extend the Server to the Maintenance Position” on page 63
2. Remove power from the server.
See “Disconnect Power Cords From the Server” on page 62
3. Remove the top cover.
See “Remove the Top Cover” on page 67
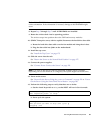
4. (SPARC Enterprise server; 8-drive capable) Disconnect and stow the hard drive
data cable:
a. Unplug the hard drive data cable from J6401 on the motherboard.
b. Remove the hard drive data cable from its seat on the CMP air duct.
c. Place the hard drive cable end out of the way of the air duct.
5. Unpackage the replacement FB-DIMMs and place them on an antistatic mat.
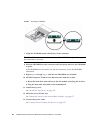
6. Ensure that the ejector tabs on the connector that will receive the FB-DIMM are
in the open position.


