Servicing Motherboard Components 93
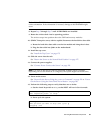
Note – If the FB-DIMM does not easily seat into the connector, it may not have the
correct orientation. If the orientation is reversed, damage to the FB-DIMM might
occur.
8. Repeat Step 5 through Step 7 until all FB-DIMMs are installed.
9. Rotate the air duct back into its operating position.
The air duct snaps into position above the CMP and memory modules.
10. (SPARC Enterprise server, 8-drive capable) Reconnect the hard drive data cable.
a. Route the hard drive data cable over the fan module and along the air duct.
b. Plug the data cable into J6401 on the motherboard.
11. Install the top cover.
See “Install the Top Cover” on page 175.
12. Slide the server into the rack.
See “Return the Server to the Normal Rack Position” on page 177.
13. Connect the power supplies.
See “Connect Power Cords to the Server” on page 178.
Note – As soon as the power cords are connected, standby power is applied.
Depending on how the firmware is configured, the system might boot at this time.
14. Power on the server.
See “Power On the Server Using the poweron Command” on page 179 or “Power
On the Server Using the Front Panel Power Button” on page 180.
15. Perform the following steps to verify that there are no faults:
a. Set the virtual keyswitch to diag so that POST will run in Service mode.
b. Power cycle the system.
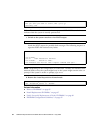
-> set /SYS/keyswitch_state=Diag
Set ‘keyswitch_state’ to ‘Diag’
-> stop /SYS
Are you sure you want to stop /SYS (y/n)? y
Stopping /SYS


