Servicing Boards and Components 151
3. (SPARC Enterprise T5120 server, 8 disk-capable) Remove fan FM1.
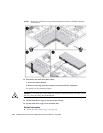
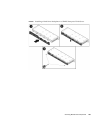
4. Slide the hard drive cage back until the hard drive backplane engages with the
paddle card connector.
Caution – Use care when installing the hard drive cage in the chassis. Align the
hard drive cage with the base of the chassis before sliding the cage back. This care is
needed to avoid damaging components.
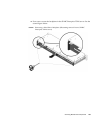
5. Replace the No. 2 Phillips screws securing the hard drive cage to the chassis.
Two screws secure the disk cage to each side of the chassis.
6. (SPARC Enterprise T5220 server) Install the fan power boards.
See “Install the Fan Power Board” on page 145.
7. (SPARC Enterprise T5220 and SPARC Enterprise T5120 8-disk capable servers)
Install the fan modules.
See “Install a Fan Module” on page 127.
8. Install the top cover.
See “Install the Top Cover” on page 175.
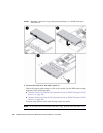
9. (SPARC Enterprise T5120) Install the inner glides.
Slide each inner glide onto the mounting studs on the server until the glide snaps
into place.
10. (SPARC Enterprise T5120) Install the server into the rack.
See “Reinstall the Server in the Rack” on page 176.
11. Install the hard drives.
Note – Take care to be certain you are installing the hard drives in the correct drive
bays.
See “Install a Hard Drive” on page 73.
12. Install the DVD/USB module.
See “Install the DVD/USB Module” on page 141.
13. Connect the power cords.
Note – As soon as the power cords are connected, standby power is applied.
Depending on how the firmware is configured, the system might boot at this time.


