4-3
Setting Windows 3.1 printing options
Now you have installed the printer software in Windows, there are a number of settings
that you may need to change if you have special printing requirements. Most users do not
need to change these settings.
If you want to change print options:
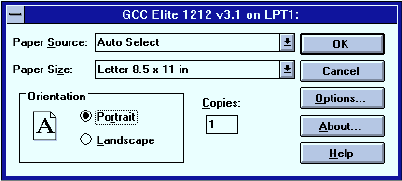
1. Click Setup in the “Printers” dialog box. You’ll see the Setup dialog box.
Paper Source
You choose which paper tray supplies the printer from the Paper Source drop-down menu.
• If you choose Auto Select, the printer selects the paper tray that holds the paper size
selected in the Paper option of the Page Setup dialog box. This option only works if
you have more than one paper tray.
• If you choose Tray 1, the printer uses paper from the Elite 12ppm’s main tray.
• If you choose Tray 2, the printer uses paper from the lower tray (if this extra tray is
installed).
• If you choose Manual Feed, the printer waits for you to place paper or other media
(transparency film, for example) in the multipurpose feeder. When you have done
this, you must press the Manual Feed key on the printer’s control panel to draw the
paper into the printer.
• If you choose MPFeeder, the printer uses paper from the multipurpose feeder. Unlike
the Manual Feed option, the printer doesn’t require you to press the Manual Feed
button on the control panel, but you must have paper ready in the Multipurpose
feeder.
Paper Size
If you want to change the paper size, click the Paper Size drop-down menu, and choose the
paper size.


