


Chapter 9 Remove/Replace Procedures
101
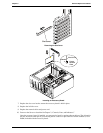
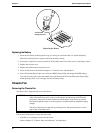
Replacing the System Board
1. Remove the replacement system board and any cables from the anti-static shipping container.
2. Place the system board on an anti-static pad and set all jumper connections as recorded during the
system board removal.
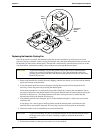
3. Place the system board in the chassis aligning the rear panel connectors to the rear chassis and the
mounting holes in the board with the holes in the chassis.
4. Install all the screws into the system board to secure it to the chassis.
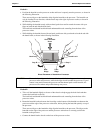
5. Replace all cables that were disconnected during the previous removal.
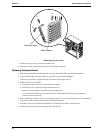
6. Replace the DIMMs, processor and heatsink-cooling fan and accessory boards.
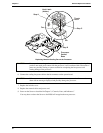
7. Replace the left side cover.
8. Return the Server to the upright position.
9. Connect the power cord and any external cables to the Server.
10. Power on the Server as described in Chapter 2, “Controls, Ports, and Indicators.”
11. Enter the (BIOS) Setup Utility and set the BIOS configuration.
12. Reboot the Server and verify the Server is operating correctly.