


Chapter 9 Remove/Replace Procedures
97
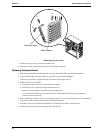
6. If the power supply is defective and the replacement power supply does not have the mounting bracket,
remove the mounting bracket from the defective supply before going to the next procedure.
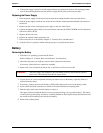
Replacing the Power Supply
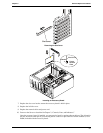
1. Place the power supply into the chassis and connect the mounting bracket to the top of the chassis.
2. Slide the power supply toward the rear of the chassis with the mounting bracket attached to the inside of
the chassis.
3. Replace the four screws securing the power supply to the rear of the chassis
4. Connect the internal power cables to the system board connector, the FDD, CD-ROM, and all of the hard
disk drives (IDE or SCSI).
5. Replace the left side cover.
6. Replace the external cables and power cord.
7. Power on the Server as described in Chapter 2, “Controls, Ports, and Indicators.”
8. Verify the Server’s operation, before allowing anyone to log back into the Server.
Battery
Removing the Battery
1. If the Server is operating, power down the Server.
Refer to Chapter 2, “Controls, Ports, and Indicators” for instructions.
2. Disconnect the power cord and any external cables connected to the Server.
If necessary, label each one to expedite re-assembly.
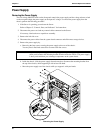
3. Remove the cover and turn in the Server feet, so the Server will lie flat on its side.
WARNING The power supply will continue to provide standby current to the HP Server until the
power cord is disconnected from the AC power source.
4. Lay the Server on it side (components showing) for better access to the battery, especially when it is
released from the socket.
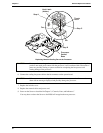
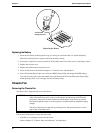
5. If necessary, remove any accessory boards or SCSI cables that prevent access to the battery socket.
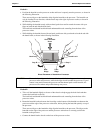
6. Insert a small flat-blade screwdriver or similar tool between the battery and spring latch.
7. Push the spring latch away from the battery to release it.
The spring contacts beneath the battery cause it to pop up allowing you to grasp the battery. The battery
is held in place against spring contacts by a latching mechanism. Pressing the release mechanism toward
the outside of the mounting socket releases the battery.
8. Remove the existing battery.