


Installing options 65
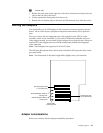
5. Refer to the documentation that comes with your adapter for any cabling
instructions. It might be easier for you to route any cables before you install the
adapter.
6. Remove the adapter from the static-protective package.
Attention: Avoid touching the components and gold-edge connectors on the
adapter. If you need to put down the adapter, place the adapter, component-side
up, on a flat, static-protective surface.
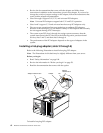
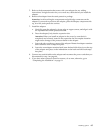
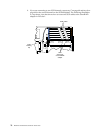
7. Install the adapter:
a. Carefully grasp the adapter by its top edge or upper corners, and align it with
the expansion slot on the processor board.
b. Press the adapter firmly into the expansion slot.
Attention: When you install an adapter in the server, be sure that it is
completely and correctly seated in the expansion slot. Incomplete insertion
might cause damage to the processor board or the adapter.
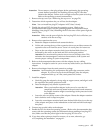
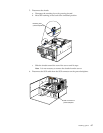
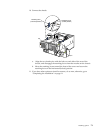
c. Lower the tab over the top corner of the adapter. Rotate the adapter retention
latch clockwise until it snaps into place.
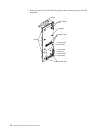
d. Lower the rear adapter retention latch (near the hard disk drives) over the top
of the adapter and press on the indentation on the latch until the latch snaps
into place.
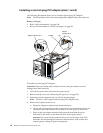
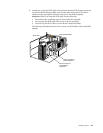
8. Connect any needed cables to the adapter and reconnect the power cords that you
disconnected in step 1 on page 64.
9. If you have other options to install or remove, do so now; otherwise, go to
“Completing the installation” on page 91.