


Management
10-7
10
10
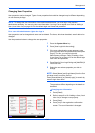
Enter the login password and press [OK].
11
Press [Confirm Password].
12 Enter the same login password to confirm and
press [OK].
13
Press [OK].
14
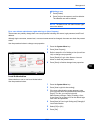
Press [Change] of Access Level.
15
Select the user access privilege and press [OK].
16
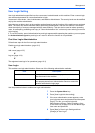
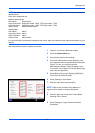
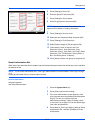
Press [Change] of Account Name.
17
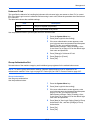
Select the account and press [OK].
NOTE: Select [Name] and [ID] from the Sort pull-down
menu to sort the account list.
Press [Search(Name)] or [Search(ID)] to search by
account name or account ID.
18
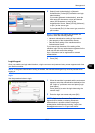
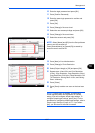
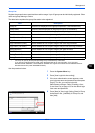
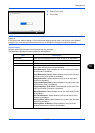
Press [Next] of Local Authorization.
19
Press [Change] of Print Restriction.
20
Select [Reject Usage] or [Off] and press [OK].
21
Repeat steps 19 and 20 to set Print Restriction
(Color), Copy Restriction, Copy Restriction (Color),
Copy Restriction (Full Color), Send Restriction, Fax
TX Restriction, Storing Restr. in Box, and Storing
Restr. in Memory.
22
Press [Close].
23
Press [Save] to add a new user on the local user
list.
NOTE: If simple login is enabled, a confirmation
screen appears when new registration is finished
asking if you will configure simple login settings. To
configure simple login settings, press [Yes]. For the
procedure for configuring simple login settings, refer to
Simple Login Settings on page 10-17. If you select
[No], you will return to the user list screen.
User: - Account Name
1/2
Select account to which this user will be attached.
OKCancel
Search(Name)
Search(ID)
Account Name Account ID
Detail
Name
Sort
00002000
00005000
00003000
00004000
Status
02
03
04
05
Account
Account
Account
Account
01 Account
00001000
Other Account
10/10/2010 10:10
User: - Local Authorization
Print Restriction:
Send Restriction:
Copy Restr. (Full Color):
Close
FAX TX Restriction:
Copy Restriction (Color):Copy Restriction:
Change
Print Restriction (Color):
Status
Change
Change
Change
Storing Restr. in Box:
10/10/2010 10:10
Change
Change
Storing Restr. in Memory:
Change
Change
Change
Off
Off
Off
Off
Off
Off
Off
Off
Off