


Management
10-23
10
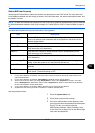
Managing Accounts
This changes the registered account information or deletes the account.
Use the procedure below to manage accounts.
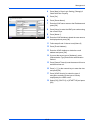
1 Press the System Menu key.
2 Press [User Login/Job Accounting].
3 If the user authentication screen appears, enter
your login user name and password and then press
[Login]. For this, you need to login with
administrator privileges. Refer to Adding a User
(Local User List) on page 10-5 for the default login
user name and password.
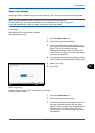
4 Press [Next] of Job Accounting Setting and then
[Add/Edit] of Accounting List.
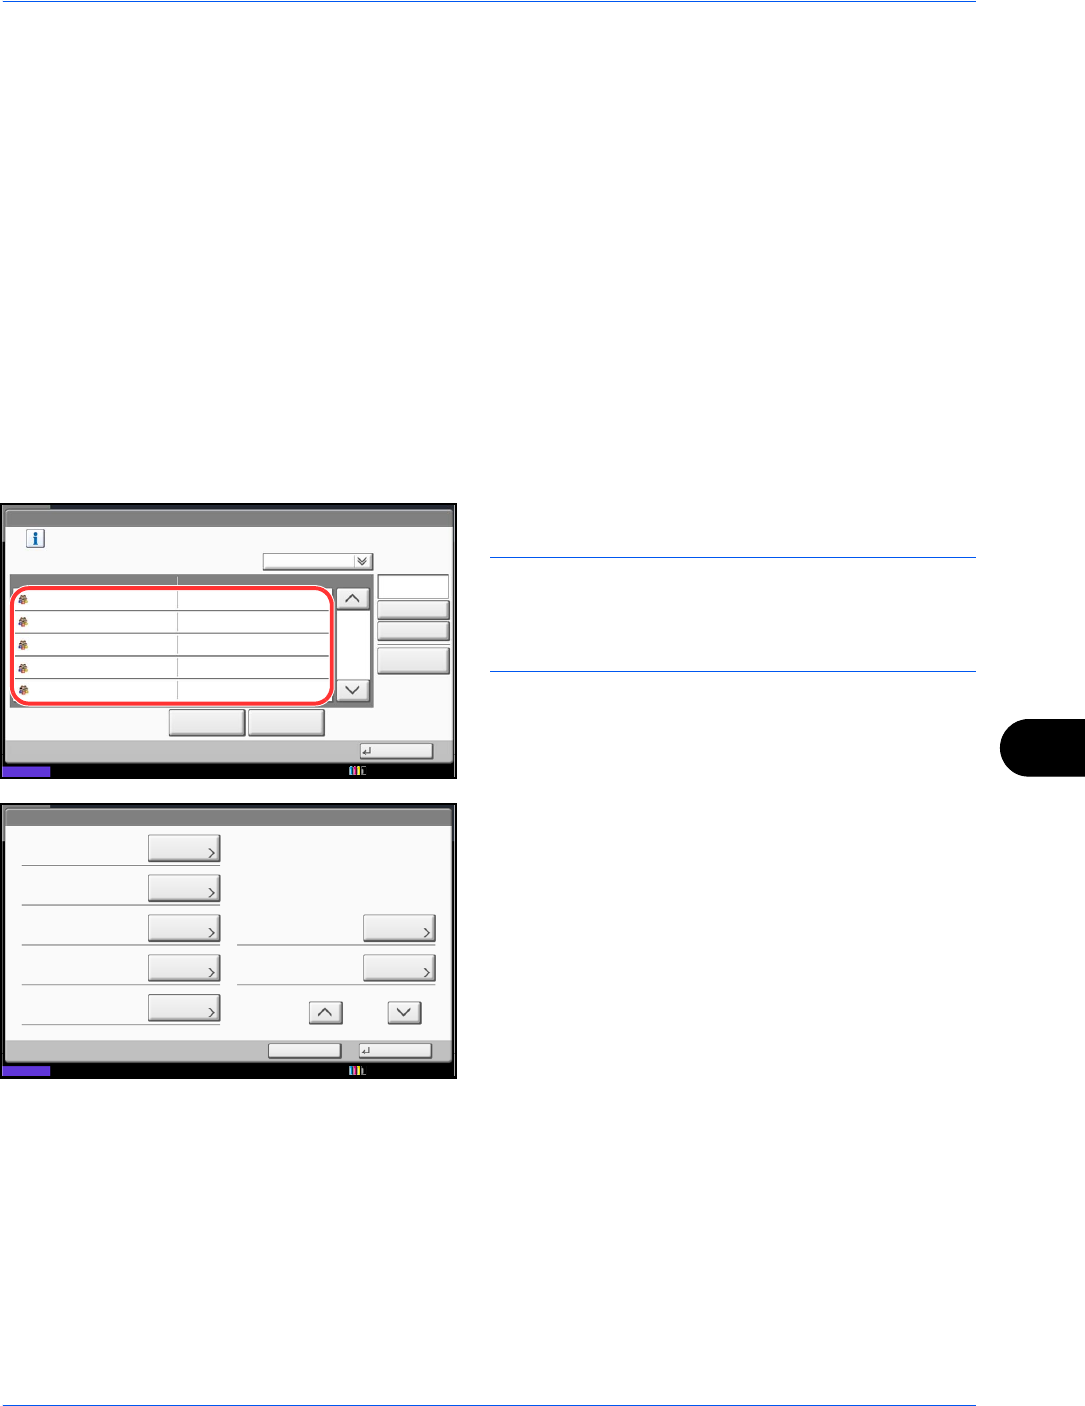
5 Select an account to change or delete.
NOTE: Select [Name] or [ID] from the Sort pull-down
menu to sort the account names.
Press [Search(Name)] or [Search(ID)] to search by
account name or account ID.
The procedure differs depending on the details to
be edited.
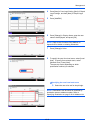
Changing account information
1 Press [Detail].
2 Refer to steps 5 to 7 of Adding an Account and
steps 2 to 5 of Restricting Using the Machine
to change account information.
3 Press [Save].
4 Press [Yes] in the registration confirmation
screen. The account information is changed.
Deleting an account
1 Press [Delete].
2 Press [Yes]. To delete the account.
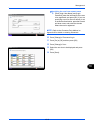
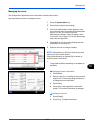
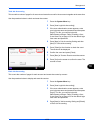
User Login/Job Accounting - Accounting List
1/2
Register an account that is permitted to use this machine. (Maximum: 1000)
Search(Name)
Search(ID)
Account Name
Account ID
Detail
Name
Sort
00001000
00002000
00005000
00003000
00004000
Delete
Add
Close
Status
01
02
03
04
05
Account
Account
Account
Account
Account
10/10/2010 10:10
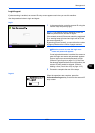
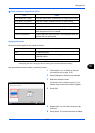
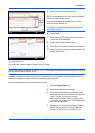
Account:
Print Restriction (Total):
Copy Restriction (Total):
Save
Copy Restr. (Full Color):
Account ID:
Cancel
OffOff
Off
00001000
Print Restr. (Full Color):
Off
Account Name:
01
Change
Status
Copy Restr. (SingleColor):
Off
Change
Change
Change
Change
Change
Change
1/2
Account
10/10/2010 10:10