


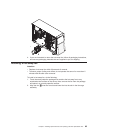
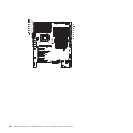

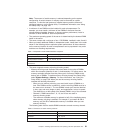
1 DIMM 1 (reserved) 9 DIMM 9 (reserved)
2 DIMM 2 10 DIMM 10
3 DIMM 3 11 DIMM 11
4 DIMM 4 (reserved) 12 DIMM 12 (reserved)
5 DIMM 5 13 DIMM 13
6 DIMM 6 14 DIMM 14
7 DIMM 7 15 DIMM 15
8 DIMM 8 16 DIMM 16
.
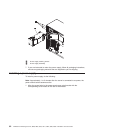
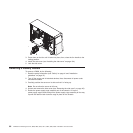
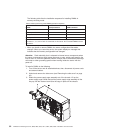
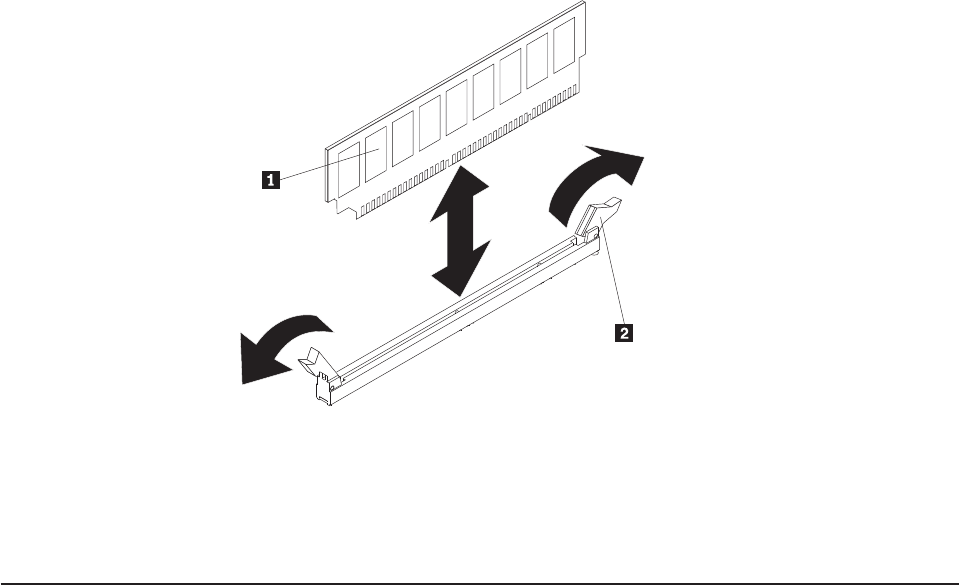
Attention: To avoid breaking the DIMM retaining clips or damaging the DIMM
connectors, open and close the clips gently.
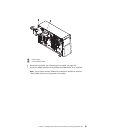
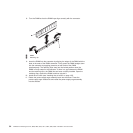
8. Carefully open the retaining clips on each end of the DIMM connector and
remove the DIMM.
1 DIMM
2 Retaining clip
9. If you are instructed to return the DIMM, follow all packaging instructions, and
use any packaging materials that are supplied to you for shipping.
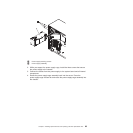
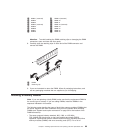
Installing a memory module
Note: If you are replacing a faulty DIMM, make sure that the replacement DIMM is
the correct type of memory. If you are adding DIMMs, install the DIMMs in the
sequence indicated in this section.
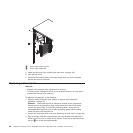
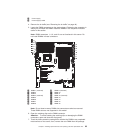
The following notes describe the types of dual inline memory modules (DIMMs) that
the server supports and other information that you must consider when installing
DIMMs (see “System-board option connectors” on page 30 for the location of the
DIMM connectors):
v The server supports industry-standard, 800, 1066, or 1333 MHz,
PC3-10600R-999 (single-rank or dual-rank) double-data-rate 3 (DDR3),
registered, synchronous dynamic random-access memory (SDRAM) dual inline
memory modules (DIMMs) with error correcting code (ECC). For a list of
Chapter 5. Installing optional devices and replacing customer replaceable units 89