Do not insert a memory DIMM in this connector.This DIMM slot is not supported in this model.
Do not insert a memory DIMM in this connector.This DIMM slot is not supported in this model.
Do not insert a memory DIMM in this connector.This DIMM slot is not supported in this model.
Do not insert a memory DIMM in this connector.This DIMM slot is not supported in this model.
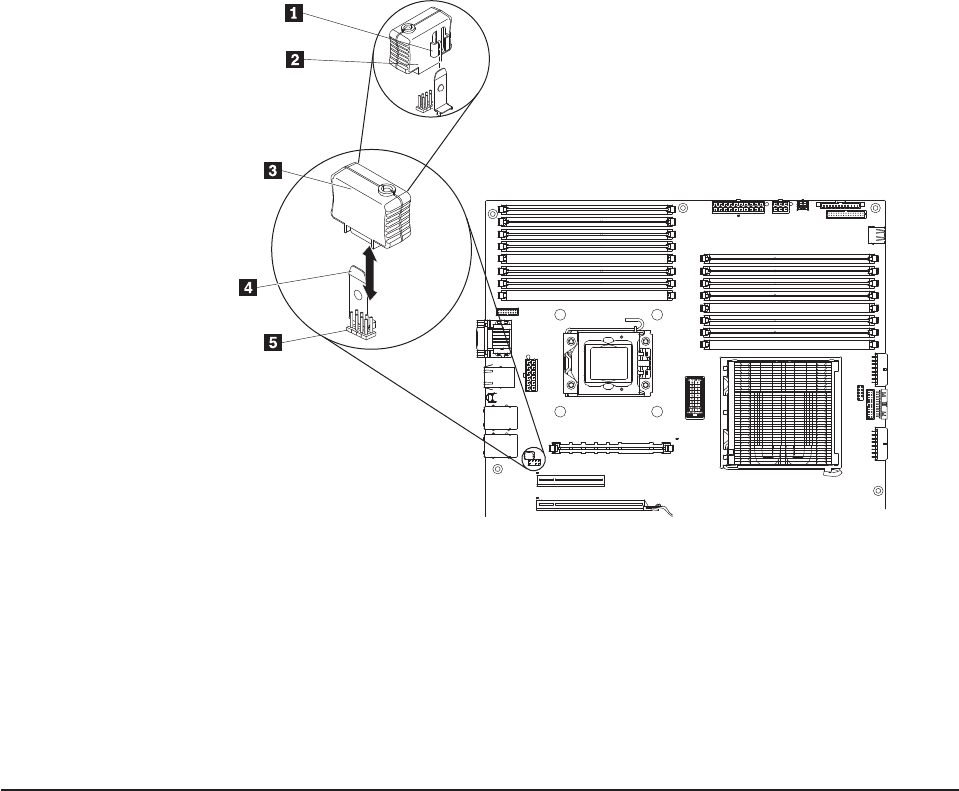
1 Alignment bracket
2 Virtual media key (rear)
3 Virtual media key (front)
4 Retention tab
5 Virtual media key connector
7. If you are instructed to return the virtual media key, follow all packaging
instructions, and use any packaging materials that are supplied to you for
shipping.
Installing the virtual media key
To install a virtual media key, do the following:
1. Read the safety information (see “Safety” on page vii and “Installation
guidelines” on page 37).
2. Turn off the server and peripheral devices, and disconnect the power cords
and all external cables.
3. Unlock the side cover.
4. Remove the side cover (see “Removing the side cover” on page 43).
5. Carefully position the server on its side so that it is lying flat and facing up.
Note: Do not allow the server to fall over.
6. Rotate the rear adapter-retention bracket to the open (unlocked) position.
7. Remove any adapters that prevent you from accessing the virtual media key
connector on the system board.
Note: Make a note of the cabling for later when you reinstall the adapters.
8. Align the alignment bracket on the rear of the key with the retention tab on the
system board; then, slide the key down into the virtual media key connector on
the system board until it is firmly seated in place.
126 ThinkServer TD200 Types 3724, 3808, 3809, 3815, 3817, 3824, 3826, 3836: Installation and User Guide


