


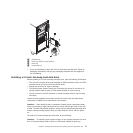

1. Read the safety information (see “Safety” on page vii and “Installation
guidelines” on page 37).
2. Touch the static-protective package that contains the drive to any unpainted
metal surface on the server; then, remove the drive from the package and
place it on a static-protective surface.
3. Remove the filler panel from the drive bay, if one is installed.
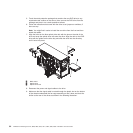
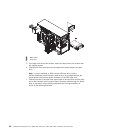
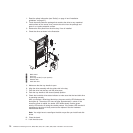
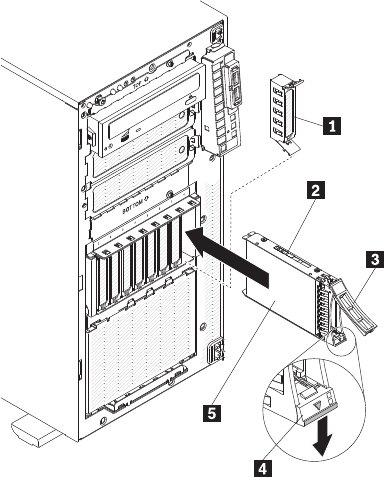
4. Orient the drive as shown in the illustration.
1 EMC shield
2 Drive tray
3 Drive tray handle (in open position)
4 Release latch
5 Hard disk drive
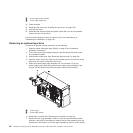
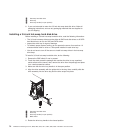
5. Make sure that the tray handle is open.
6. Align the drive assembly with the guide rails in the bay.
7. Push the drive into the bay until the drive stops.
8. Push the tray handle to the closed (locked) position.
9. Check the hard disk drive status indicator to make sure that the hard disk drive
is operating correctly.
After you replace a failed hard disk drive, the green activity LED flashes as the
disk spins up. The amber LED turns off after approximately 1 minute. If the
new drive starts to rebuild, the amber LED flashes slowly, and the green
activity LED remains lit during the rebuild process. If the amber LED remains lit
continuously, the drive is faulty and must be replaced. See the Hardware
Maintenance Manual.
Note: You might have to reconfigure the disk arrays after you install hard disk
drives.
10. Close the bezel.
11. Lock the side cover.
72 ThinkServer TD200 Types 3724, 3808, 3809, 3815, 3817, 3824, 3826, 3836: Installation and User Guide