


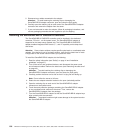

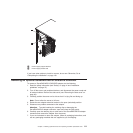
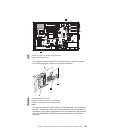
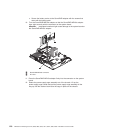
1 ServeRAID-MR10i controller
2 PCI slot 1
10. Press the ServeRAID-MR10i adapter firmly into the connector on the system
board.
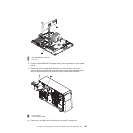
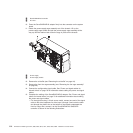
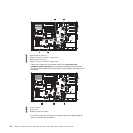
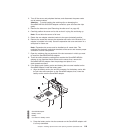
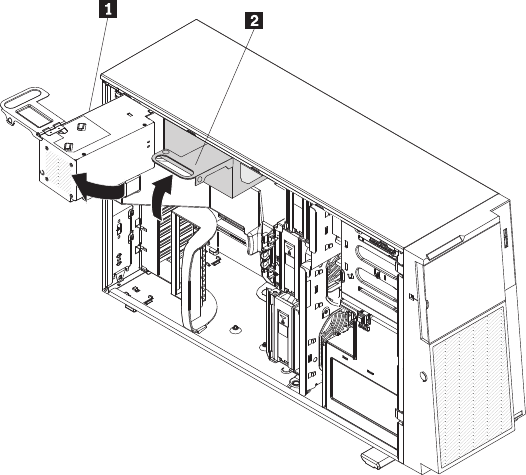
11. Rotate the power-supply cage assembly out of the chassis. Lift up the
power-supply cage handle and pull the power-supply cage assembly all the
way up until the retainer latch locks the cage in place on the chassis.
1 Power supply
2 Power-supply handle
12. Remove the air baffle (see “Removing the air baffle” on page 44).
13. Remove the front fan cage assembly (see “Removing the fan cage assembly”
on page 46).
14. Connect the configuration signal cable. See “Power and signal cables for
internal drives” on page 78 for information about cabling the power and signal
cables.
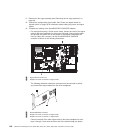
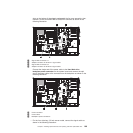
15. Complete the cabling of the ServeRAID-MR10i adapter. See “Power and signal
cables for internal drives” on page 78 for additional information about cabling
the power and signal cables.
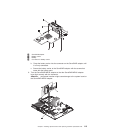
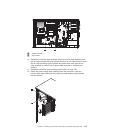
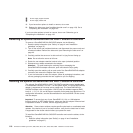
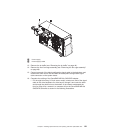
v For the eight drive-bay, 2.5-inch server model, connect one end of the signal
cable to the drive backplane for drive bays 0 through 3 and route the other
end through the plastic slot on the bottom of the chassis underneath the
front fan cage; then, connect it to the ServeRAID-MR10i SAS/SATA
controller as shown in the following illustrations:
114 ThinkServer TD200 Types 3724, 3808, 3809, 3815, 3817, 3824, 3826, 3836: Installation and User Guide