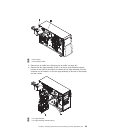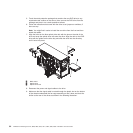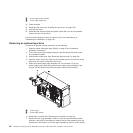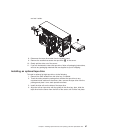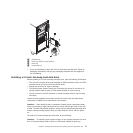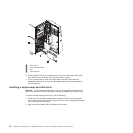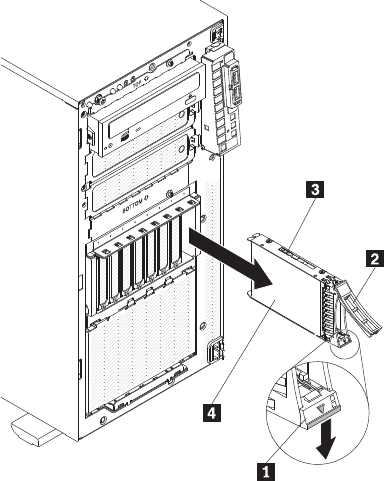
1 Release latch
2 Drive tray handle (in open position)
3 Drive tray
4 Hard disk drive
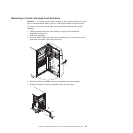
7. If you are instructed to return the 2.5-inch hot-swap hard disk drive, follow all
packaging instructions, and use any packaging materials that are supplied to
you for shipping.
Installing a 2.5-inch hot-swap hard disk drive
Before installing a 2.5-inch hot-swap hard disk drive, read the following information:
v The 2.5-inch hot-swap drives must be either all SAS hard disk drives or all SATA
hard disk drives; do not mix SAS and SATA drives.
v Inspect the drive tray for signs of damage.
v To maintain proper system cooling, do not operate the server for more than 10
minutes without either a drive or a filler panel installed in each drive bay.
v You do not have to turn off the server to install hot-swap drives in the hot-swap
drive bays.
Locate the documentation that comes with the hard disk drive and follow those
instructions in addition to the instructions in this section.
Attention: Static electricity that is released to internal server components when
server is powered-on might cause the server to halt, which might result in the loss
of data. To avoid this potential problem, always use an electrostatic-discharge wrist
strap or other grounding system when you work inside the server with the power
on.
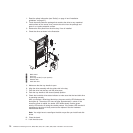
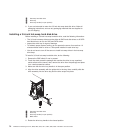
To install a 2.5-inch hot-swap hard disk drive, do the following:
Attention: To maintain proper system cooling, do not operate the server for more
than 10 minutes without either a drive or a filler panel installed in each bay.
Chapter 5. Installing optional devices and replacing customer replaceable units 71


