


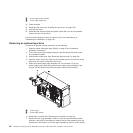
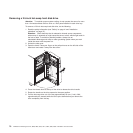
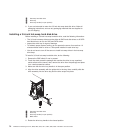


1 Hot-swap hard disk drive
2 Drive tray
3 Drive tray handle (in open position)
6. If you are instructed to return the 3.5-inch hot-swap hard disk drive, follow all
packaging instructions, and use any packaging materials that are supplied to
you for shipping.
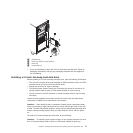
Installing a 3.5-inch hot-swap hard disk drive
Before installing a 3.5-inch hot-swap hard disk drive, read the following information:
v The 3.5-inch hot-swap drives must be either all SAS hard disk drives or all SATA
hard disk drives; do not mix SAS and SATA drives.
v Inspect the drive tray for signs of damage.
v To maintain proper system cooling, do not operate the server for more than 10
minutes without either a drive or a filler panel installed in each drive bay.
v You do not have to turn off the server to install hot-swap drives in the hot-swap
drive bays.
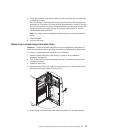
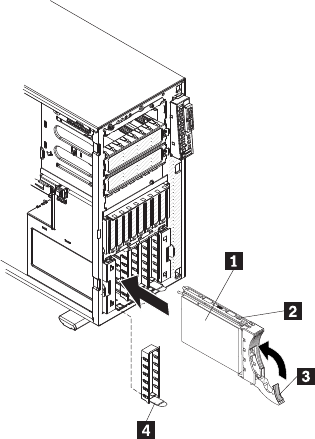
To install a 3.5-inch hot-swap hard disk drive, do the following:
1. Remove the EMC shield, if one is present.
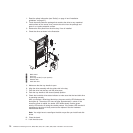
2. Touch the static-protective package that contains the drive to any unpainted
metal surface on the server; then, remove the drive from the package and place
it on a static-protective surface.
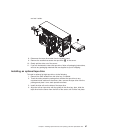
3. Make sure that the drive tray handle is in the open position.
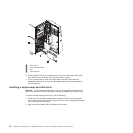
4. Align the drive assembly with the guide rails in the bay; then, carefully slide the
drive assembly into the drive bay until the drive snaps into place.
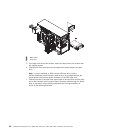
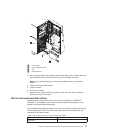
1 Hot-swap hard disk drive
2 Drive tray
3 Drive tray handle (in open position)
4 EMC shield
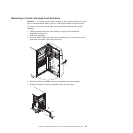
5. Rotate the drive tray handle to the closed position.
74 ThinkServer TD200 Types 3724, 3808, 3809, 3815, 3817, 3824, 3826, 3836: Installation and User Guide