


2. Turn off the server and peripheral devices, and disconnect the power cords
and all external cables.
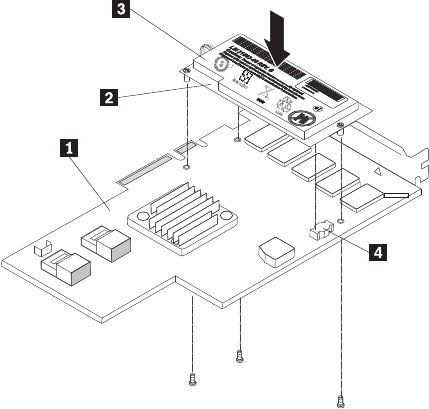
Attention: To avoid breaking the retaining clips or damaging the
ServeRAID-MR10is SAS/SATA adapter connector, open and close the clips
gently.
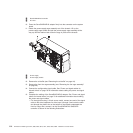
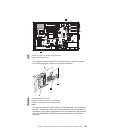
3. Remove the side cover (see “Removing the side cover” on page 43).
4. Carefully position the server on its side so that it is lying flat and facing up.
Note: Do not allow the server to fall over.
5. Rotate the rear adapter-retention bracket to the open (unlocked) position.
6. Remove the screw that secures the expansion-slot cover to the chassis (if no
adapter is installed in the slot). Store the expansion-slot cover and screw in a
safe place for future use.
Note: Expansion-slot covers must be installed on all vacant slots. This
maintains the electronic emissions standards of the server and ensures proper
ventilation of server components.
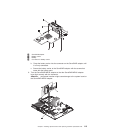
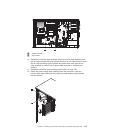
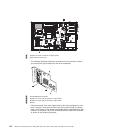
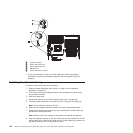
7. Open the retaining clips on each end of the slot connector in which you want
to install the ServeRAID-MR10is adapter.
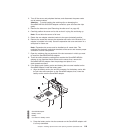
8. Touch the static-protective package that contains the ServeRAID-MR10is
adapter to any unpainted metal surface on the server; then, remove the
ServeRAID-MR10is adapter from the package and place it on a
static-protective surface.
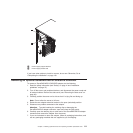
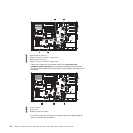
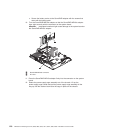
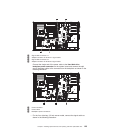
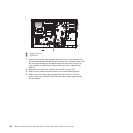
9. If the battery pack (battery carrier and battery) did not come installed on the
ServeRAID adapter, install the battery pack.
a. Align the battery carrier pins and the connector for the battery carrier with
the pin holes and connector on the ServeRAID adapter; then, lower the
battery carrier onto the ServeRAID adapter.
1 ServeRAID adapter
2 Battery carrier
3 Battery
4 Connector for battery carrier
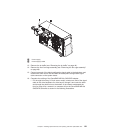
b. Press the battery carrier into the connector on the ServeRAID adapter until
it is firmly connected.
Chapter 5. Installing optional devices and replacing customer replaceable units 119