D8B Manual • Chapter 2 • page 27
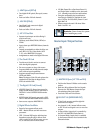
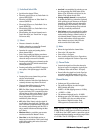
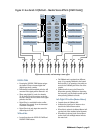
7 Fader Bank Select LEDs
• Just below the channel V-Pots.
• When the green LEDs are on, Fader Bank 1 is
selected (MIC/LINE).
• When the red LEDs are on, Fader Bank 2 is
selected (TAPE IN).
• When both LEDs are on, Fader Bank 3 is se-
lected (EFFECTS).
• When neither LED is on, Fader Bank 4 is se-
lected (MASTERS).
• When flashing, the selected channels are in
Punch Run mode (see “Punch Run” on page
56 for more info).
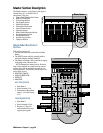
8 Select
• Chooses a channel to be edited.
• Enables onboard or on-screen Fat Channel
control over the selected channel.
• Operative for copying and pasting data be-
tween channel strips.
• Part of the grouping and linking procedures.
• Double-clicking the SELECT button opens and
closes the strip’s on-screen Fat Channel.
• Pressing and holding opens a channels prefer-
ences page in the VFD, which controls basic
channel parameters.
• Pressing and holding two SELECT buttons at
once opens a Link options page in the VFD.
9 Solo
• Pressing Solo on any channel lets you hear
only the soloed channel.
• Mackie’s exclusive Rude Solo Light flashes in-
cessantly whenever any channel is soloed.
• There are three different types of soloing
available: PFL, AFL, and Mixdown.
• PFL (Pre-Fader Listen) solos the signal before
it gets to the fader. PFL is a monitor function
only and has no effect on the Master L-R mix
send. Any channel is soloed in mono, regard-
less of pan position. PFL solo level is
unaffected by fader changes.
• AFL (After-Fader Listen) solos the signal af-
ter the fader in the signal path. Therefore, solo
level is affected by fader movement. AFL solos
the accurate pan positioning and, like PFL, is
only a monitor function not affecting the Mas-
ter L-R mix.
• Mixdown Solo is a post-fader, pan-accurate
solo that overrides the Master L-R mix.
• Clear Solo, in the Solo/Studio section, re-
leases any solo selections. This is particularly
useful when working with solos across mul-
tiple fader banks.
• Aux Solo is accomplished by selecting an aux
bus, then pressing the SOLO button by the
Master V-Pot. When this solo light is on, the
Master V-Pot adjusts the solo level.
• Soloing multiple channels is accomplished
by holding the shift key (onboard or keyboard)
while pressing the solo buttons on all desired
channels or, by holding one solo down while
pressing others. Also, selecting “Solo Latch”
in Setup > Mix Options keeps solos selected
until they’re manually switched off.
• Solo Isolate mode is accomplished by holding
down the Alt key on the keyboard or control
surface while pressing a channel’s solo(s). A
solo isolated channel is always active to the
solo bus and therefore will not mute when
other channels are soloed. Only PFL solo
mode overrides Solo Isolate mode.
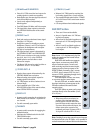
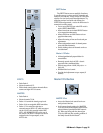
bl Mute
• Mutes the signal after the channel fader.
• Prior to the L-R output bus.
• Prior to Bus 1–8 outputs.
• Does not affect the Direct Out to Tape unless
console is configured for Faders to Tape mode.
bm Channel Fader
• Controls the signal level from the channel to
the bus or buses it is assigned to (typically the
L/R Master Fader and the Bus 1–8 output).
• Doesn’t affect the signal level to the Tape Out-
puts unless specifically routed to do so, or if
console is configured for Faders to Tape mode.
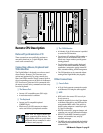
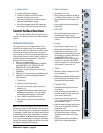
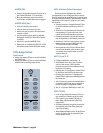
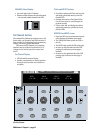
Channel Meters
• Indicate post-EQ, pre-fader levels.
• The audio level display is scaled in digital
dBFS (decibels full-scale).
• 0 dBFS = +20 dBu (clipping occurs at +22 dBu).
• –15 dBFS = +5 dBu
• The minimum displayed level is –50 dBFS.
• Markings next to the LED ladders are denoted
as –50 dBFS to OL; they are similar in func-
tion to those of digital recorders. Each
LED-segment is accurate within ±1 dB.
Note: Typically, in digital recording devices such as
MDMs, HDRs, or DATs, there is a built-in overhead of
3–4 dB above the 0 dBFS mark to match the typical
maximum unbalanced analog console bus output value
of +22 dBu. The OL LED lights at +22 dBu.


