


Beyond the Basics
7
The
LCD
now displays either:
or
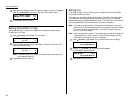
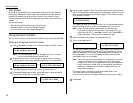
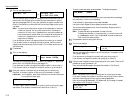
You now have the option to enter (or change) an alternative number. Your fax
machine will dial this alternative number during a transmission or polling
operation (see pages 2.29-2.31) only after redials to the regular number have
failed. If the alternative number also fails, the fax alarm beeps to alert you to
a problem.
Note: You can enter one alternative number for one speed-dial or one-touch
number you entered. Your fax holds a maximum of 10 alternative
numbers in all, that is, only 10 speed-dials or one-touch numbers can
have the alternative number. After you have entered the alternative
numbers for 10 speed-dials or one-touch numbers, the fax will no
longer show this display.
If you do not want to enter or change an alternative number, go on to step 8.
If you do want to enter or change an alternative number, use the numeric
keypad to do so the same way you did in step 5. This number can be up to 40
characters long
8
Press
ENTER
.
9
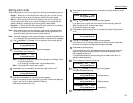
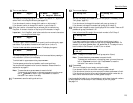
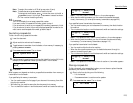
The
LCD
now displays:
or
The machine is now prompting you for a name — a Location
ID
— so you’ll be
able to find it in the EasyDial directory (see page 2.15).
If you don’t want to enter or change this number’s Location
ID
, skip to step 11.
If you do want to enter or change this number’s Location
ID
, go on to step 10.
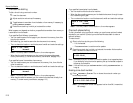
10
Enter the Location
ID
the same way you entered your fax name during
EasyStart. A number’s Location
ID
may be up to 24 characters in length.
Important: As in EasyStart, enter letters and other non-numeric characters
by using the one-touch keys.
The word “Upper” means the machine is currently set for entering only upper-
case letters. If you press
R
, the machine will see it as an
R
(not an r).
To enter a lower-case letter, press
ALPHABET
. The display changes to:
This means pressing one-touch keys will enter lower-case letters: pressing
R
will produce an r (not an
R
) on the display.
To switch back for upper-case entries, press
ALPHABET
.
Use the one-touch keypad to enter spaces, punctuation and symbols.
You can also use the
CODE
function to enter characters. Please review the
explanation on page 2.2.
Note: To erase characters, press
CANCEL
to erase to the left.
To change one character in the name, press to move the cursor left,
or /
PROGRAM
to move it right. Press
CANCEL
to erase the character.
Then re-enter the name correctly.
11
Press
ENTER
to save the setting and continue.
12
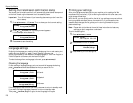
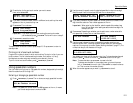
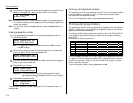
The
LCD
now displays:
or
You may now assign this number to up to 32 call groups. (If necessary, review
“Call groups,” page 2.8.)
If you do not want to change this number’s call group, skip to step 14.
If you do want to change this number’s call group, go on to step 13.
13
Use the numeric keypad to enter the call groups for this number. There are 32
possible call groups, numbered 1–32.
Here, we’ve entered 6 to assign this speed-dial number to Call Group 6:
Note: You do not have to insert a leading zero for the call group number.
If you want to assign the number to more than one call group, insert a comma
after each number (except the last one) by pressing
GROUP DIAL
.
Here, we’ve entered 6,
GROUP DIAL
, 1,7,
GROUP DIAL
,3,0to assign this speed-
dial number to Call Groups 6, 17 and 30:
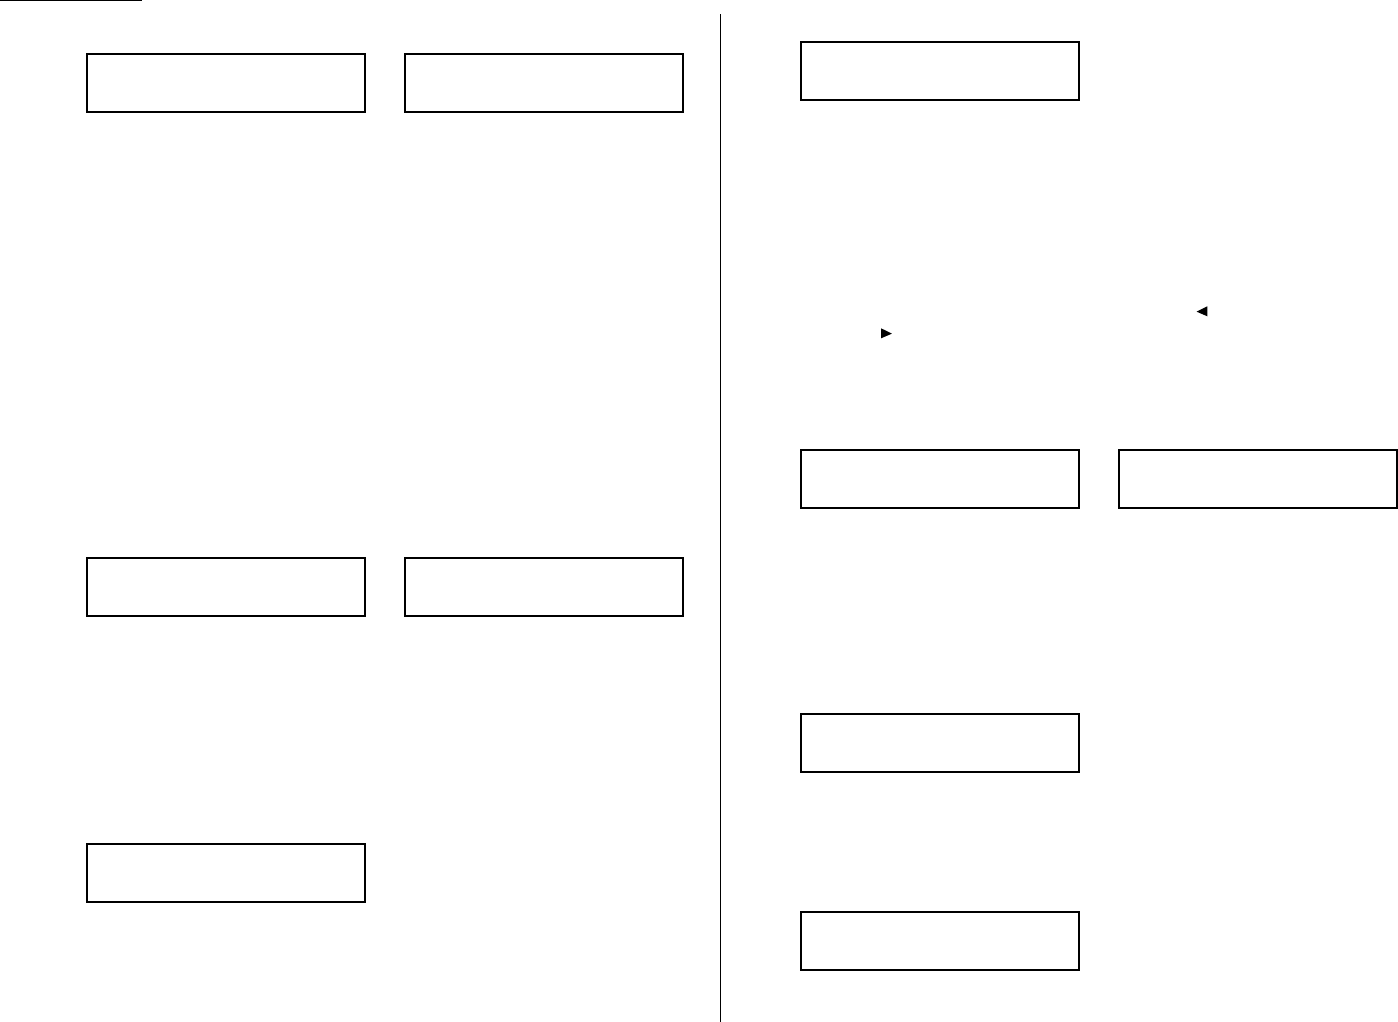
005:Group No.
6,17,30_
005:Group No.
6_
005:Group No.
1,4,12_
005:Group No.
_
005:Name ;Lower
_
005:Name ;Upper
_
005:Name ;Upper
West Coast Sales_
005:Name ;Upper
_
005:Alt. No.
9-1-555-789-3556_
005:Alt. No.
_
2.12