ACCULINK 316x DSU/CSU
3-34 December 1996 3160-A2-GB22-10
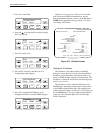
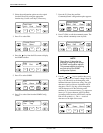
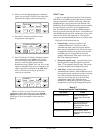
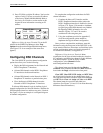
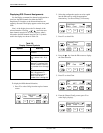
8. Press F2 (Edit) to edit the IP address. Y
ou have the
option of using F3 (Clear) to reset the IP address
to the factory default 000.000.000.000. Refer to
the Setting the IP Address section earlier in this
chapter for more information on setting an IP
address.
F1
Trap
n
I
P A
dr:
Next Edit Clear
F2
F3
Differences
Using the Async T
erminal: To set the IP
address for the SNMP Trap Manager
, select
Trap
Options from the main/configuration/edit/snmp menu.
(See Figure 3-23 for an example of the screen that
appears.)
Configuring DS0 Channels
The 316x DSU/CSU provides channel configuration
options that allow you to do the following:
•
Display the DS0 assignments for the Network and
DSX-1 Drop/Insert T1 interfaces.
• Allocate DS0 channels on the DSX-1 Drop/Insert
T1 interface to the Network interface.
• Allocate DS0 channels on the Network or DSX-1
Drop/Insert T1 interfaces to particular data ports.
• Clear (deallocate) all DS0 channels from the
Network or DSX-1 Drop/Insert T1 interfaces.
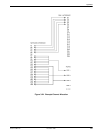
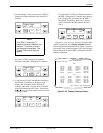
To allocate DS0 channels, begin by defining logical
channel configuration for Network interface, and then the
DTE Drop/Insert interface, and then any ports, if desired.
See Figure 3-24 for an example of a conceptual diagram
of channel configuration.
To complete the configuration worksheets for DS0
channel allocation:
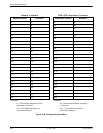
1. Complete the Network T1 Interface and the
DSX-1 Drop/Insert Interface tables (unless the
DSX-1 Drop/Insert interface is disabled) as shown
in Figure 3-25. Figure 3-26 contains a worksheet
for specifying which DS0 channels carry Robbed
Bit Signaling (RBS) information for voice
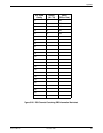
channels. Figures 3-27 and 3-28 contain a
worksheet for allocating data ports.
2.
Using the worksheets provided in Appendix G,
circle the configuration options needed to
implement the logical channel configuration.
Once you have completed the worksheets, enter this
information using the front panel of the DSU/CSU or the
Async terminal interface. Procedures are listed later in this
section; configuration options are listed in Appendix C.
For additional worksheets, see Appendix G.
Differ
ences Using the Async T
erminal:
Menu
or
ganization for the async terminal makes the selections
for configuring and displaying channels slightly different
from the front panel. To edit or display channel
configurations, select
Channel from the
main/configuration/edit menu.
The channel menu provides the selection Display
Channels
which combines the
NET
and
DTE
selections
found under the
Dsply
selection on the front panel.
Clear NET,
Clear DTE, DTE Assign,
and
DTE V
oice
are all individual selections at the channel menu level.
The front panel has these selections subleveled with
DTE
and
NET under Clear
and
Assign
and
Voice under DTE.
The channel menu also provides individual port
selections. (See Figures 3-14 and 3-15 for menu hierarchy
differences between interfaces.)


