


132
Image Adjustment
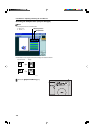
Image Adjustment
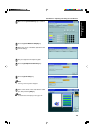
You can change the following default settings for image adjustment:
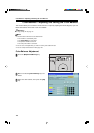
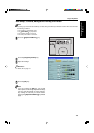
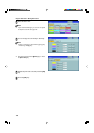
Soft/Sharp
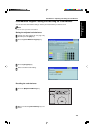
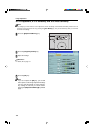
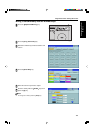
Contrast
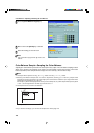
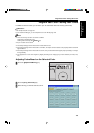
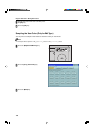
Background Density
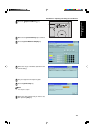
Pastel
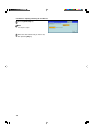
U.C.R. Adjustment
A.C.S. (Auto Color
Selection) Sensitivity
Text/Photo Sensitivity
You can adjust the edges of the image to make the image sharper or softer.
Reference
❐ For copy samples, ☛ see page 20.
Note
❐ Default: level 4
You can adjust the contrast between light parts and dark parts of the image.
Reference
❐ For copy samples, ☛ see page 20.
Note
❐ Default: level 5
You can adjust the background density control.
Reference
❐ For copy samples, ☛ see page 20.
Note
❐ Default: level 5
❐ If copying a newspaper or an original with a dark background, adjust the background
density to a lighter setting.
❐ If part of the original is marked with a highlighting pen, adjust the background density
to a darker setting. However, because the color of a highlighting pen is difficult to
duplicate, it might be copied in different colors or some colors might not be copied.
You can make copies in pastel tones.
Reference
❐ For copy samples, ☛ see page 20.
Note
❐ Default: level 9 which yields a normal color copy
You can adjust the black toner density to make the black parts clearer in Full Color mode.
Note
❐ Default: level 5
❐ Adjust this setting to a darker setting when you want to copy letter parts clearly in
black.
❐ Adjust this setting to a lighter setting when the original image is dark.
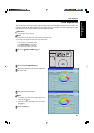
You can adjust the sensitivity when detecting whether the original has color areas in
Auto Color Select mode. When set to “B&W” values, the machine will be more likely to
detect originals as black originals. “Full Color” values will cause the machine to be more
likely to detect originals as color originals.
Note
❐ Default: level 3
You can adjust the sensitivity when detecting letter and photo parts of an original in Text/
Photo mode. If letter parts photo parts of an original are not differentiated correctly, adjust
this setting.
Note
❐ Default: level 5