


Fax features
296
4. Special Features
1
Press (fax) > (Menu) > Fax Feature > Receive Forward >
Forward to Fax, Forward to PC , Forward to Email or Forward to
Server on the control panel.
Or select Setup > Machine Setup > Next > Fax Setup > Receive
Forward > Forward to Fax, Forward to PC , Forward to Email or
Forward to Server on the touch screen.
• Forward options may not be available depending on model or optional
goods (see "Variety feature" on page 8).
• To set the machine to print out a fax when fax forwarding has been
completed, select Forward&Print.
2
Enter the destination fax number, email address, or server address and
press OK.
3
Enter the starting tim and ending time, then press OK.
4
Press (Stop/Clear) button or home( ) icon to return to ready
mode.
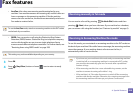
Subsequent sent faxes will be forwarded to the specified fax machine.
36
Sending faxes on both sides of paper
• This is available only when you load originals into the document feeder.
• Some menus may not appear on the display depending on options or
models. If so, it is not applicable to your machine.
• This feature may not be available depending on model or optional goods
(see "Features by models" on page 5).
1
Place a single document face down on the document glass, or load the
documents face up into the document feeder.
2
Press (fax) > Fax Feature > Duplex on the control panel.
Or select Fax > Select the menu you want > Select Duplex from the sub-
menus > on the touch screen.
• 1 Sided: For originals that are printed on one isde only.
• 2 Sided: For originals that are printed on both sides.
• 2 Sided Rotated: For originals that are printed on both sides, but the
back is rotated 180°.
To use 2 Sided and 2 Sided, Rotated, load the originals on the DADF. If the
machine cannot detect the original on the DADF, it automatically changes
the option to 1 Sided.