


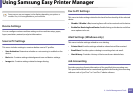
Using Samsung Easy Document Creator
317
5. Useful Management Tools
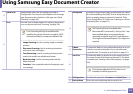
Using Quick Scan
1
Place a single document face down on the document glass, or load the
documents face up into the document feeder (see "Loading originals" on
page 60).
2
Click Quick Scan from the home screen.
3
Select a save location for the scanned images.
4
Click Save to save the image.
Click Scan More to scan another image with the same settings.
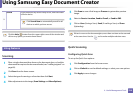
Scanning to a Social Networking Site
Scan Directly
1
Place a single document face down on the document glass, or load the
documents face up into the document feeder (see "Loading originals" on
page 60).
2
Click SNS Upload from the home screen.
3
Click Scan to SNS > Start.
4
Click Scan.
Upload Existing File
1
Click SNS Upload from the home screen.
2
Click Existing File to SNS > Start.
3
Select the site and click Add Image to find the file to upload.
4
Select a social networking site to send the image and click Next.
5
Follow the instructions in each social networking site.
If there are some problems on accessing or uploading to each SNS site due
to a network environment issue, it's needed to check security limitations
established in your network with network administrator. To guarantee
correct functioning of SNS upload in Samsung Easy Document Creator,
unrestricted network environment is needed for HTTPS communication.
Converting to an E-Book
Scan Directly
1
Place a single document face down on the document glass, or load the
documents face up into the document feeder (see "Loading originals" on
page 60).
2
Click E-Book Conversion from the home screen.