SAN/IP Client installation on Windows NT, 2000 and 2003.
You must be an administrator or have administrator privileges in order to
install the client.
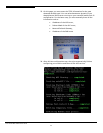
• Insert the ASC installation CD into your CD-ROM drive.
• Select
Install Products
-->
Install ASC SAN Client
.
• If the CD browser does not launch, navigate to the \Client\Windows
directory and run
ISinstall.exe
to launch the client install program.
• Note: During the installation, the Microsoft “Digital Signature Warning”
window will appear to indicate that the software has not been certified by
Microsoft. Click
YES
to continue the installation process.
• After accepting the license agreement, indicate the type of client you are
installing, Fibre Channel or SAN/IP.
• When done, click
Finish
.
Note: The client installs a device driver. Therefore a Windows NT computer
must be rebooted before the client can use storage resources. (It is not
necessary to reboot a Windows 2000 computer.)
SAN/IP Client installation on Linux
Note: You should not install the Linux client on an ASC Server machine. The
ASC Server installation includes a local Linux Client to service NAS Resources. If
the Linux Client were to be installed on an existing ASC Server, all access to
NAS Resources would be lost.
Prior to installing the ASC SAN Client for Linux, assign SAN Resources to the
client machine. To do this, use the
Assign a SAN Resou ce Wizardr
in the
Console. When you are asked to select the SAN Client, click the
Add
button
and type in the name of the Linux machine.
The name must match the output of “uname –n” from the client machine.
For more information, refer to
‘Assign a SAN Resource to one or more clients’.
• To install the client software, log into your system as the root user.
• Mount the ASC installation CD and copy the files from the CD to a
temporary directory on the machine.
• The software packages are located in the /client/linux/ directory off the CD.
Acer Altos® NAS 700 Solution Guide
40


