26
3 As all SmartView World devices are shipped with the same login and
password settings, your new ‘default’ setup will offer easy unauthorised
access to any knowledgeable users. Therefore, your rst step MUST be to
change the standard supervisor password - see below.
4 After changing the standard supervisor password, you are then advised to
perform the following stages to prepare the system for general use:
• Organise users and groups, and determine their access rights
ð
.
• Select appropriate security settings for your installation.
• Determine how computer ports are displayed and selected.
• Display the Remote Console window and synchronise operation.
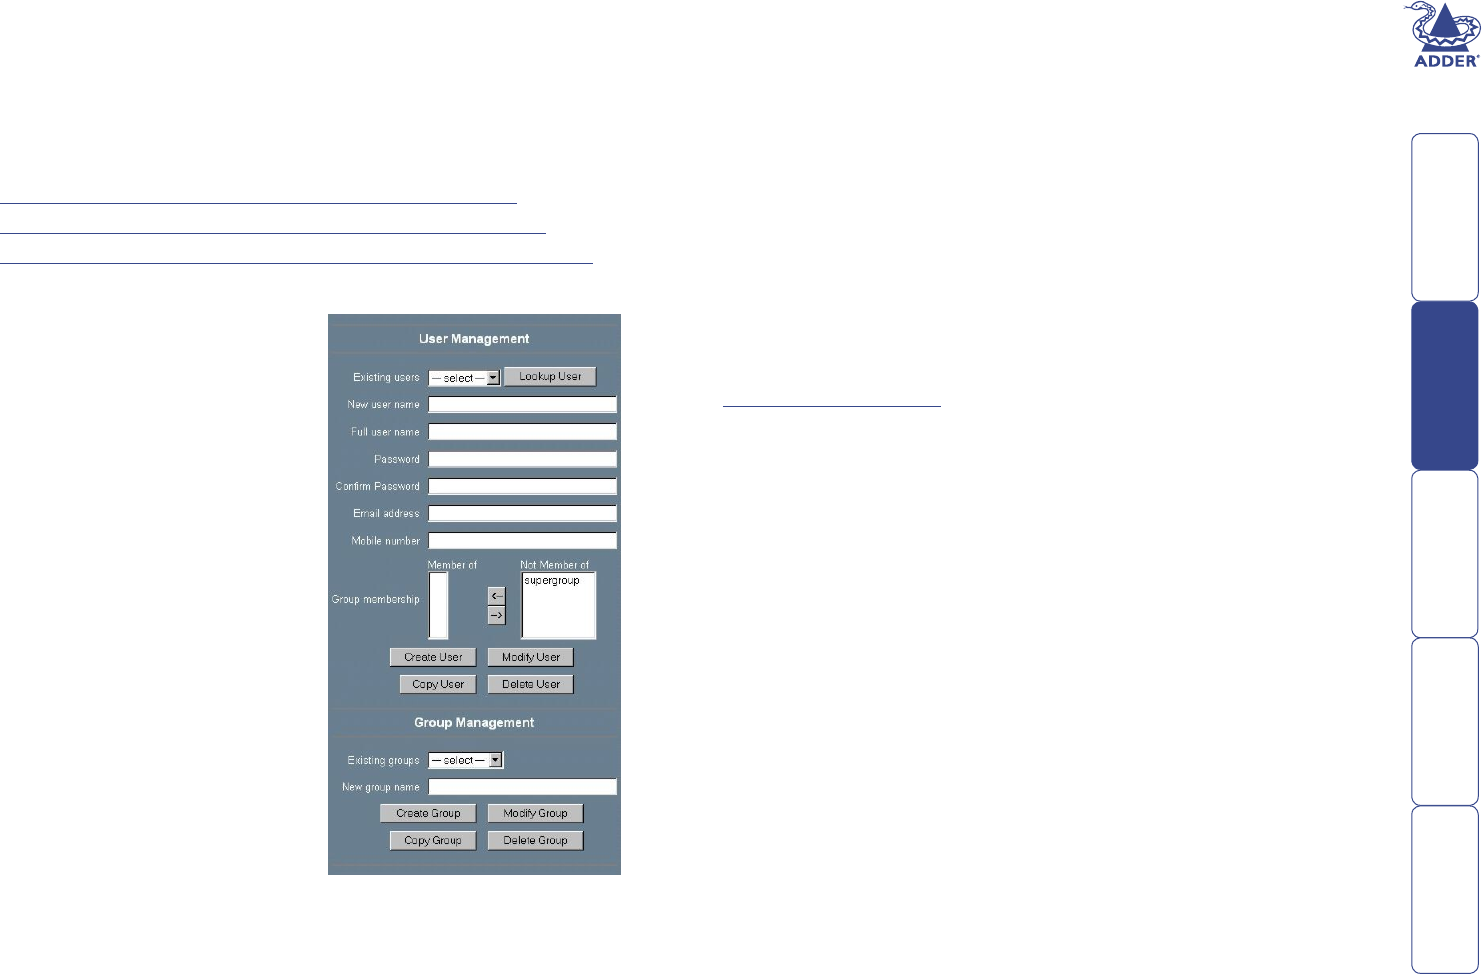
To change the superuser’s password
1 Within the SmartView World
home page, select the ‘User/
Group Management’ option in the
‘Administration’ section. The User
Management panel will be displayed.
2 Use the ‘Existing users’ control to
select the ‘super’ entry and then click
the ‘Lookup User’ button. The existing
details held for the superuser will be
displayed (the existing password will
not be displayed).
3 In the ‘Password’ eld, enter a new
password and then repeat the new
password in the ‘Conrm Password’
text box.
4 Click the ‘Modify User’ button. If the
change is carried out, then the panel
will display a message at the top to
conrm this.
Organising users and groups
The IP section of the SmartView World has the ability to maintain multiple
lists of individual users as well as groups of users. Each user can be assigned
a separate login and password, and each can be allowed access to different
sets of menu panels. Where numerous users will be granted access it is often
advantageous to collect them together within one or more groups, where
permissions can be arranged collectively. Users placed within groups can inherit
global group settings, maintain their own or obtain a mixture of both depending
on how options are set. Individual users can be added to any number of groups
and can then inherit differing permissions from those groups. In this way a
hierarchical arrangement of users can be organised, as required.
The organisation of users and groups are split into two functional areas:
• User/Group Management (see below) – In this panel, users and groups
alike can be created, copied, modied and deleted. Here also, users can be
assigned into groups.
• User/Group Permissions – In this panel, individual users and/or groups can
be assigned access rights to the various features and menus within the IP
section of the SmartView World.
Using the User/Group Management panel
To add a user
1 Within the SmartView World home page, select the ‘User/Group
Management’ option in the ‘Administration’ section. The User Management
panel will be displayed.
2 Enter a suitable login name into the ‘New user name’ eld. Use the ‘Full
user name’ eld to enter a more complete name by which the user will be
identied within the system.
Note: Spaces are not permitted in user or group names, or within
passwords. As users and groups are stored within the same list, it is
advisable to name users and groups distinctly so that they are easy to
differentiate.
3 Enter a suitable login password into the ‘Password’ eld (characters are
represented by ‘*’) and then repeat the password in the eld below.
Note: To maximise security, ensure that all passwords are at least eight
characters long and that they include a mixture of upper and lower case
letters, as well as numerals.
4 Optionally enter an email address and mobile phone number.
5 You can add the new user to a group either this stage or at any time later
on. The ‘Not member of’ eld indicates the groups that are currently
available. To add the new user, click on a group name and click the ‘<-’
button. You can repeat this procedure to also add the user to other groups.
6 Click the ‘Create User’ button to add the entered details into the list of users.


