30
Determining computer ports display and selection
When shipped, the SmartView World IP section will be congured to view only
one computer port. With a full sixteen ports to choose from, this setting and
several others need to be changed in order to make full use of the SmartView
World KVM capabilities. For each KVM port, you can edit the names that are
presented within the SmartView World home page and the Remote Console - It
is most sensible to make them the same as they are within the KVM selection
menu.
To set the number of KVM ports
1 Within the SmartView World home page, select the ‘KVM Settings’ option in
the ‘Server’ section. The User Management panel will be displayed.
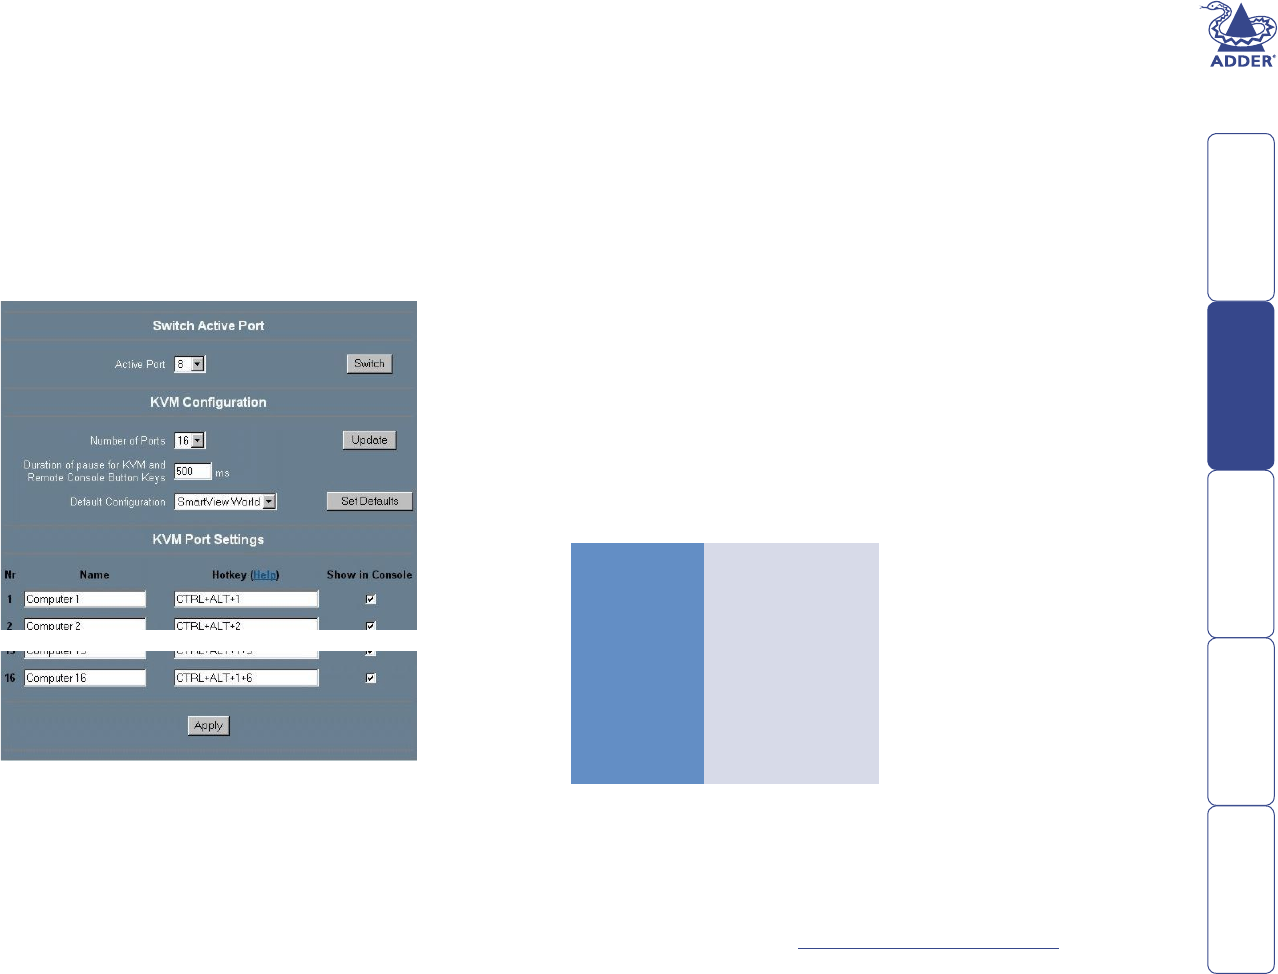
2 Use the ‘Number of
Ports’ control to select
the required number of
KVM ports. Ordinarily,
this will be 16 to equal
the physical ports
on the SmartView
World. However, when
cascading a large
number of switches and
computers, it can be
useful to create extra
ports to access the
systems lower down the
cascade structure. The
options here are 1, 2, 4,
8, 16, 32 and 64.
3 Click the Update button.
A number of elds equal
to the ‘Number of Ports’
setting will appear lower
down the panel. Each row allows you to dene a name, KVM switching
code (Hotkey) and an option to show the link as a button within the Remote
Console. The section opposite deals with editing these items.
Note: For most systems you are recommended to select the default
SmartView World conguration and then click the ‘Set Defaults’ button. This
automatically lls in all the boxes with a suitable set of default values that
makes conguration easier.
4 Click the ‘Apply’ button at the foot of the panel to save your changes.
To edit computer names and switching codes
1 Within the SmartView World home page, select the ‘KVM Settings’ option in
the ‘Server’ section. The KVM settings panel will be displayed. Dependant on
the ‘Number of Ports’ control setting, between 1 and 64 rows of computer
port entries will be displayed in the lower section of the panel. Here, for
each port, you can dene a name, KVM switching code (hotkey) and an
option to show the link as a button within the Remote Console.
2 For each port:
• Enter a name – this will be displayed within the SmartView World home
page and also within the Remote Control window.
• Enter a KVM switching code (Hotkey) – this code will be passed to the
KVM section to select the particular KVM port. It is essential that the
code entered here matches those used by the KVM section.
The standard sixteen settings (e.g. CTRL+ALT+1, etc.) are correct,
providing the standard hotkeys within the KVM conguration section
are not changed (Main Menu / Conguration Menu / Setup Options
/ Hotkeys). If the codes do not match then the various ports will not
be selectable. For instance, if the KVM section hotkeys are changed
to ‘CTRL + SHIFT’ then the Hotkey entry within this panel for port 8
must be ‘CTRL+SHIFT+8’ in order for Remote Console to switch to that
system. The various KVM and IP hotkey settings are listed below:
KVM setting IP section setting
CTRL+ALT CTRL+ALT
CTRL+SHIFT CTRL+SHIFT
ALT+SHIFT ALT+SHIFT
ALT GR ALTGR
L + R ALT LALT+ALTGR
L CTRL+ALT LCTRL+ALT
R CTRL+ALT RCTRL+ALT
Note: Addresses for cascaded computers should be entered as in their
basic KVM form, with the addition of ‘+’ and ‘>’ delimiters between each
character. For instance, (with the KVM hotkeys set to ‘CTRL and ALT’) a
cascaded computer with address 41434108 would be entered as:
CTRL + ALT + 4 > 1 > 4 > 3 > 4 > 1 > 0 > 8
For KVM hotkey setting, see To change the KVM hotkeys for details.
• Select/deselect the ‘Show in Console’ checkbox – All ports are shown
within the SmartView World home page, however, you have the option
to include or exclude ports within the Remote Console window.
3 When all settings have been made, click the ‘Apply’ button to save.
Delimeters
+
KeyA+KeyB
means ‘press KeyA
together with KeyB’
>
KeyA>KeyB
means ‘press KeyA
then KeyB’


